Your Patron Database
Look up any patron, read their history and metrics, and keep your patron list tidy with tags, archiving and merging.
Stageworks adds a patron for you when someone orders tickets online, and keeps everything they do with you in one place. Here's how to find a patron, add one yourself, read their timeline and metrics, and keep your list tidy by tagging, archiving and merging duplicates. Let's get started!
Find a patron
- Step 1:
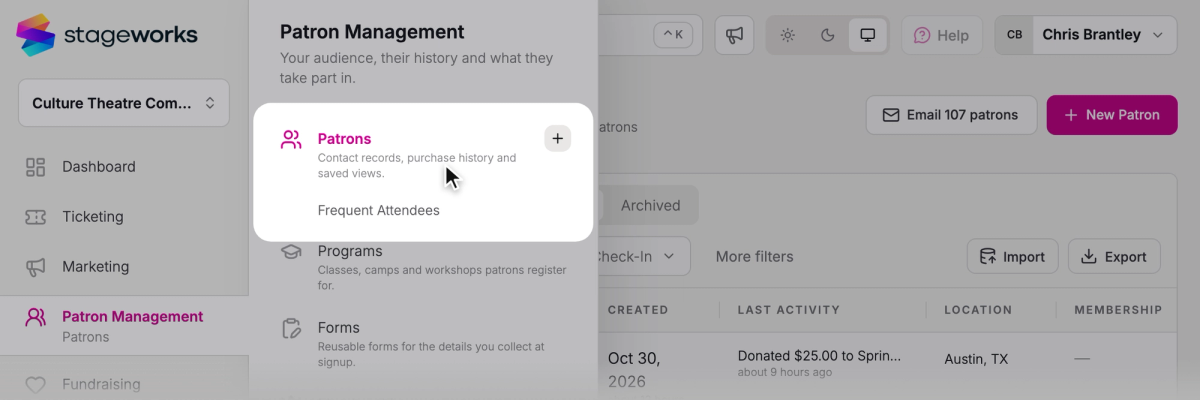
In the sidebar, click Patron Management, then Patrons.
- Step 2:
Type a name, email address or phone number in Search patrons….
- Step 3:
Click a patron to open their page.
Search matches the start of each word you type, so "jo sm" finds Joan Smith. It also looks through pinned notes.
The list opens on the Active tab, with the most recent activity first. Patrons you've archived are on the Archived tab.
To narrow the list with filters, like tags or how much patrons have spent, see Build and save patron segments.
Add a patron
- Step 1:
On the Patrons page, click New Patron.
- Step 2:
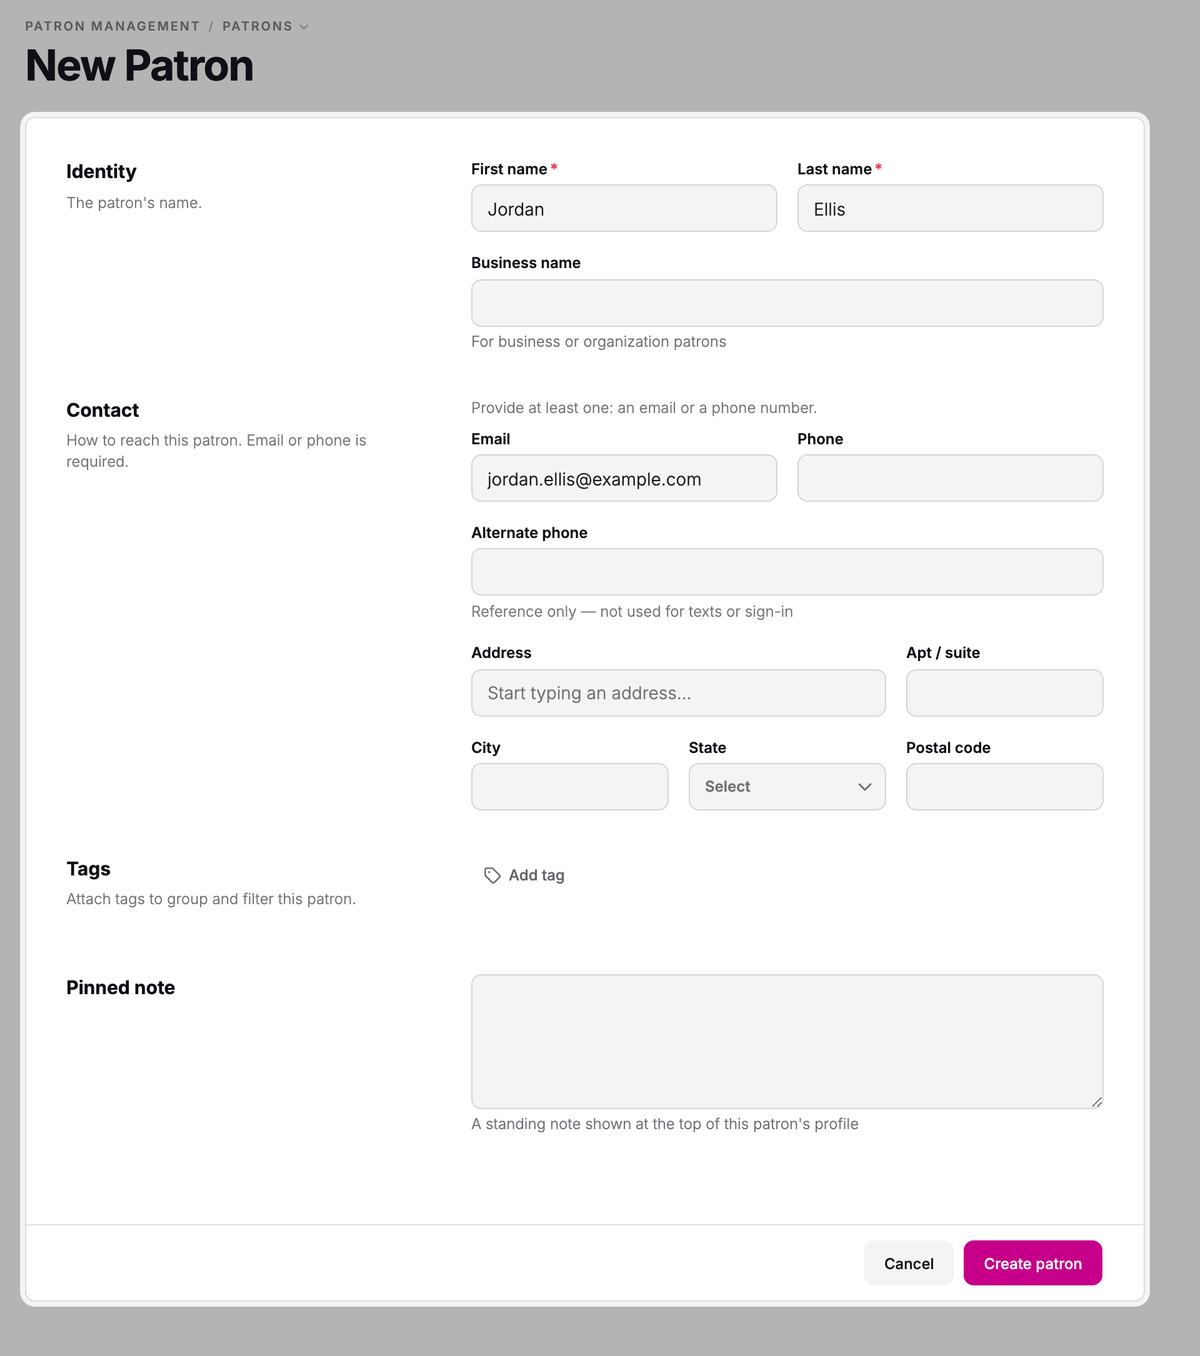
Under Identity, enter a First name and Last name. For a company or organization, enter a Business name instead.
- Step 3:
Under Contact, enter an Email, a Phone, or both.
- Step 4:
To tag them, click Add tag under Tags and pick a tag, or type a new name and choose Create new tag.
- Step 5:
Click Create patron.
A patron's page
The top of a patron's page shows their contact details and tags, with Archive, Record Donation and Add Note beside them.

Below that are the tabs:
- Timeline: their orders, donations, memberships, credits, program registrations and notes.
- Profile: their details, tags and notes. Its Communication section is covered in Patron communication preferences.
- Orders: every order they've placed.
- Donations: their gifts. To add one, see Record and import donations.
- Credits: their account credit. The tab shows the balance.
- Flex Tickets: their flex tickets, explained in Flex passes explained.
To change a patron's details, click the Profile tab, make your changes, and click Save changes.
Add a note
- Step 1:
Click Add Note at the top of the patron's page.
- Step 2:
Type your Note. To log something that happened earlier, change the Date.
- Step 3:
Click Add note.
The note goes on their timeline with your name. All their notes are listed on the Profile tab under Notes, where you can edit or archive them.
For something staff should see every time they open the patron, like a preference for aisle seats, type it in Pinned note on the Profile tab instead. It shows beside the timeline, above their metrics.
Archive or restore a patron
Patrons can't be deleted. Archiving takes someone off your active list and out of the segments you email, and keeps their history.
- Step 1:
Click Archive at the top of the patron's page.
- Step 2:
Click Archive again to confirm.
To bring them back, find them on the Archived tab, open their page and click Restore.
Read the timeline
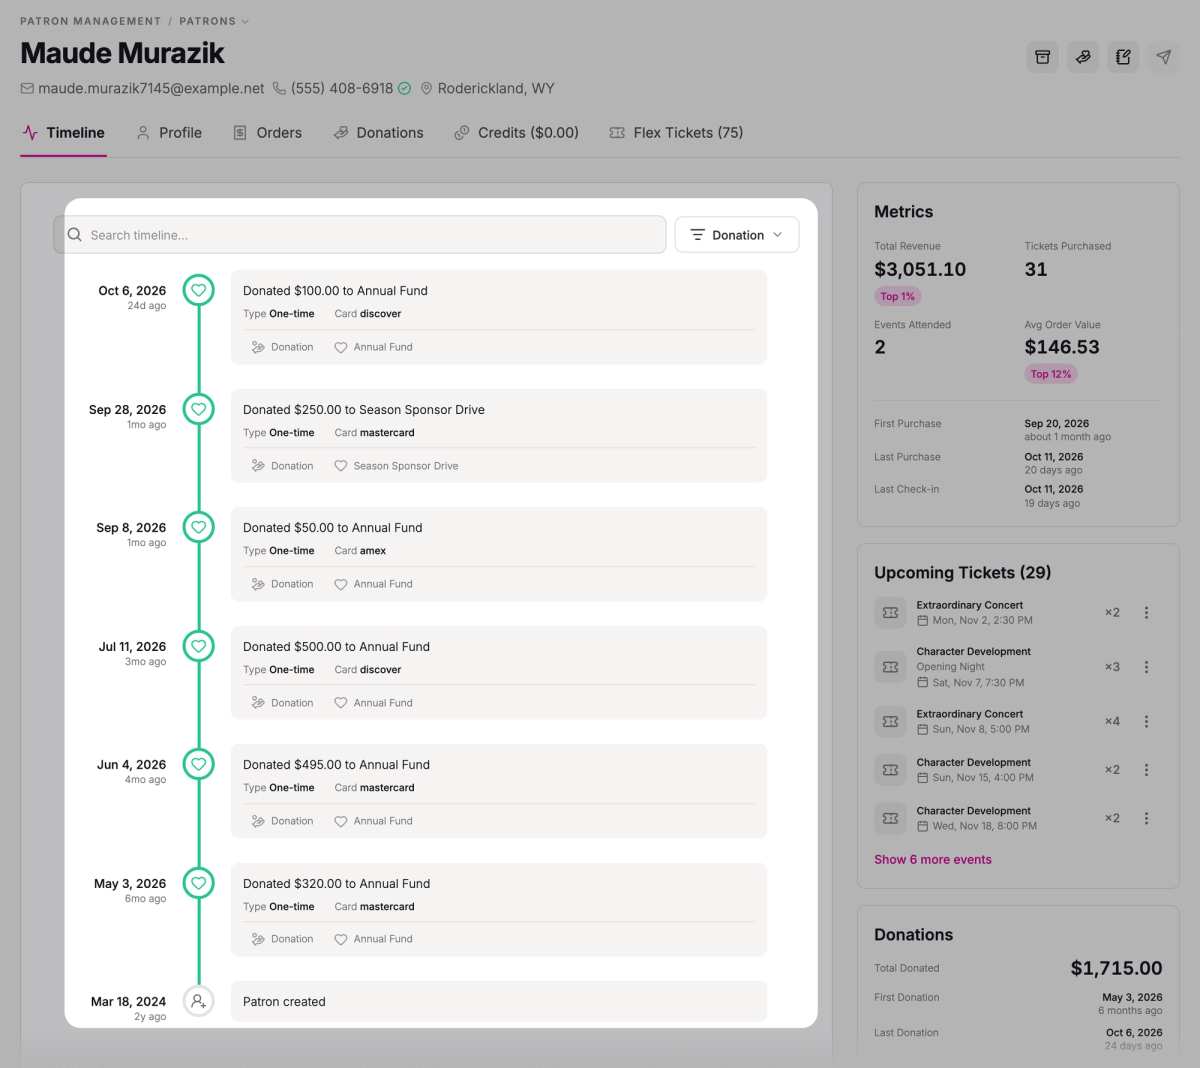
The Timeline tab tells the patron's story, newest first. Older entries load as you scroll, and most entries link to the order or donation behind them.
To find something, type in Search timeline..., like "Donated". Or narrow it by type:
- Step 1:
Click All activity.
- Step 2:
Check the types you want to see: Notes, Ticketing, Credit, Membership, Programs or Donation.
Read a patron's metrics
Beside the timeline, a summary column shows their pinned note, metrics, upcoming tickets, donations, memberships, flex tickets and credits. On a smaller screen it moves to its own Metrics tab, and opening a patron from the list takes you there first.
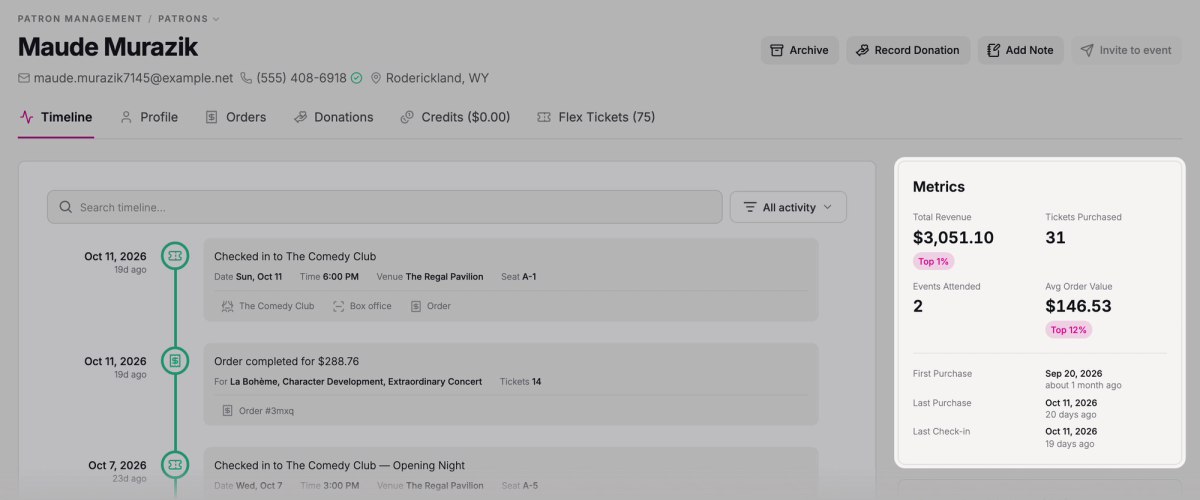
| Metric | What it shows |
|---|---|
| Total Revenue | Their completed orders, flex pass purchases, donations and membership payments, added up. |
| Tickets Purchased | Tickets on their completed orders, not counting canceled ones. |
| Events Attended | How many of their tickets have been checked in. |
| Avg Order Value | The average of their completed orders. |
| First Purchase and Last Purchase | When they first and last bought from you. |
| Last Check-in | The last time one of their tickets was checked in. |
A label like "Top 5%" beside a figure shows how the patron ranks against your other patrons.
Under Upcoming Tickets, each performance has a menu for its tickets, with Refund / Release… and Exchange… where they apply. Exchange a patron's tickets walks through exchanges.
Tag several patrons at once
Tags, like VIP or Volunteer, group patrons so you can find and filter them later.
- Step 1:
On the Patrons page, check the box beside each patron you want to tag. The box at the top of the column checks everyone on the page (a page holds 50).
- Step 2:
Click Add tags in the bar above the list.
- Step 3:
Check the tags to add, then click Add tags.
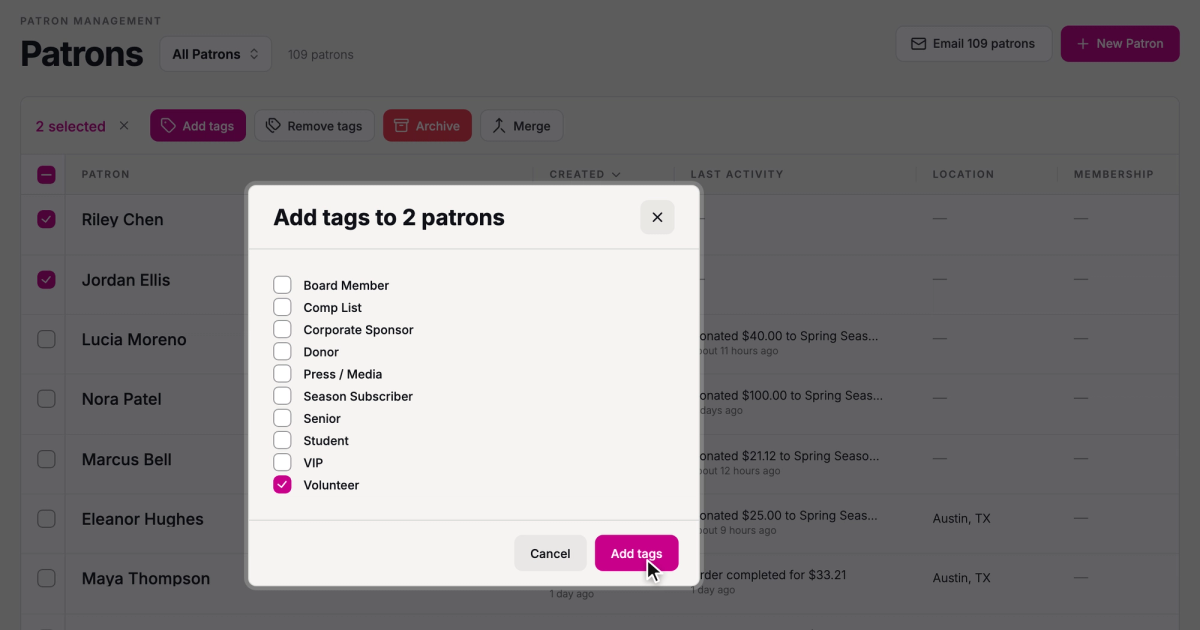
To take a tag off, follow the same steps with Remove tags. The same bar has Archive, for archiving several patrons at once.
Your checked boxes clear when you search, filter or change page, so tag one page at a time.
Merge duplicate patrons
Sometimes one person ends up with two records. Merging keeps one and moves most of the other's records onto it.
- Step 1:
On the Patrons page, search for the person's name so both records show.
- Step 2:
Check the box beside each record.
- Step 3:
Click Merge.
- Step 4:
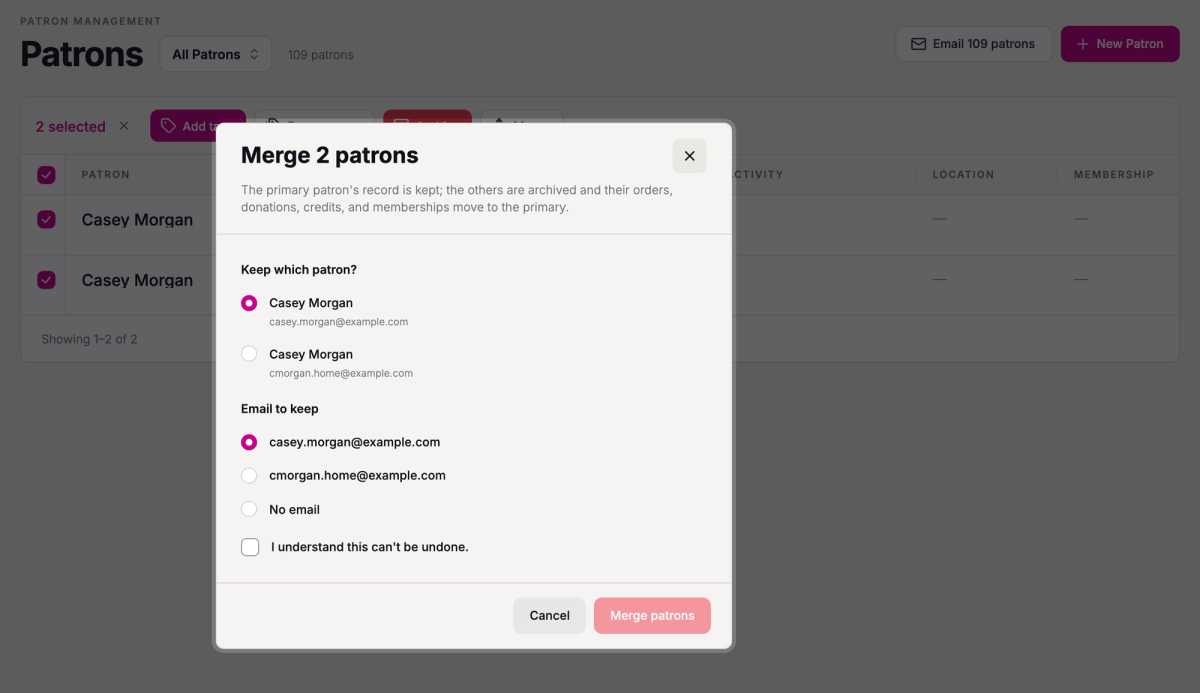
Under Keep which patron?, choose the record to keep. It keeps its own name and address.
- Step 5:
Under Email to keep and Mobile to keep, choose the contact details the patron uses now. The ones you don't keep are removed.
- Step 6:
Check I understand this can't be undone., then click Merge patrons.
The other record is archived. Its orders and tickets, memberships, donations, credit, flex passes, notes and timeline move to the patron you keep. Tags aren't carried over, so add any you need to the patron you keep. That patron's metrics are recalculated, and an entry on their timeline records the merge.
Troubleshooting
"A patron with this email already exists."
Each email address belongs to one patron, and someone already has this one. Search for them and open their record instead. If they don't turn up, they're archived: find them on the Archived tab and click Restore on their page. The same goes for "A patron with this phone number already exists."
"Required when address is provided"
You've filled in part of the address under Contact. Fill in the street address, city, state and postal code, or clear them all.
Was this article helpful?