
Build and save patron segments
Filter your patron list down to exactly the people you want, save it as a segment, and email or invite them.
Here's how to build a list of patrons from filters, like everyone who's given $250 or more or everyone tagged VIP, and save it as a segment you can come back to, email, and invite to shows. You'll filter the Patrons list, combine filters until the list is right, then save it. Let's get started!
How segments work
A segment is a saved set of filters on the Patrons list. It doesn't store a fixed list of names: every time you open it, email it, or invite it to a show, Stageworks checks its filters again.
So a segment keeps itself up to date. A patron who starts matching next month is included automatically, and one who stops matching drops out.
Segments are shared with everyone in your organization, so changing or archiving one affects your colleagues too.
Filter the patron list
- Step 1:
In the sidebar, click Patron Management, then Patrons.
- Step 2:
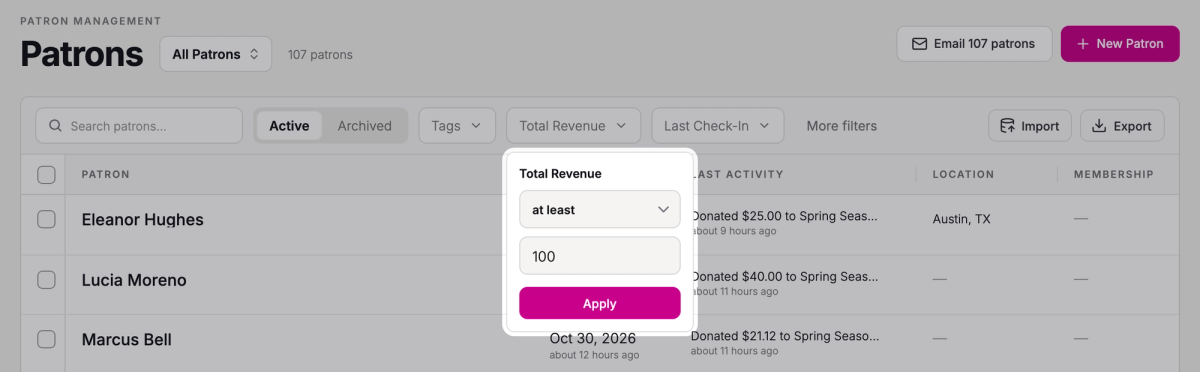
Click a filter above the table. Tags, Total Revenue, and Last Check-In are always there. Total Revenue counts a patron's orders, flex passes, donations, and memberships. Last Check-In is the last time one of their tickets was checked in.

- Step 3:
Choose how to compare, like at least, and enter a value. Money filters take dollars: type 100 for $100.
- Step 4:
Click Apply.
The table now shows only the patrons who match.
Find more filters
Every other filter is under More filters, grouped under headings such as Purchases, Events, Donations, Contact Info, Account, and Memberships. Pick one and it joins the filters above the table. You can also search the menu by name.

A few that come in handy: Last Donation for donor appeals, Attended Events for patrons with tickets to particular performances, Member Since for members, and Has Address for a postal mailing.
Combine filters
Add as many filters as you need. A patron has to match every one of them to be on the list.
The Tags filter works a little differently, because you can pick several tags in it. Choose has any of to include patrons with any of them, has all of for patrons with every one, or has none of to leave those patrons out. To tag patrons in the first place, see Find and manage your patrons.
Say you're inviting press who are also loyal supporters: patrons tagged Press / Media who've spent at least $100 and came to a show in the past year. Click Apply after setting each filter.
- Step 1:
Set Total Revenue to at least 100.
- Step 2:
In Tags, check Press / Media.
- Step 3:
In Last Check-In, choose within last and enter 365 days.

Under the Patrons title, you'll see how many patrons match, like "6 of 107 patrons match your criteria".
Save a segment
Your saved segments live in the menu at the top of the list. It reads All Patrons until you pick one.
- Step 1:
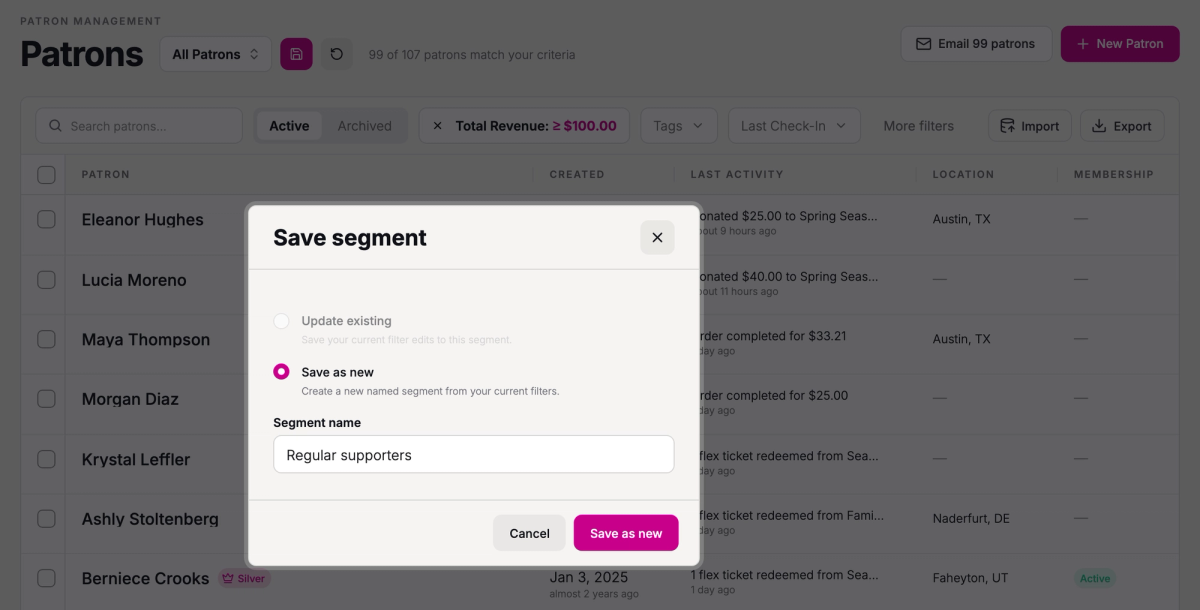
With your filters set, click Save segment, the disk icon next to the segment menu.
- Step 2:
Leave Save as new selected and enter a Segment name.
- Step 3:
Click Save as new.
You'll see "Segment created", and the segment menu now shows your segment's name.
Change a segment
Pick the segment from the segment menu and change its filters, then click Save segment. Choose Update existing to save the new filters to this segment, or Save as new to keep the original and make a second segment from your edits.
Changed your mind before saving? Revert changes, the icon beside Save segment, puts the segment's saved filters back. If you haven't picked a segment, it's Clear filters instead, which removes every filter.
Pin a segment
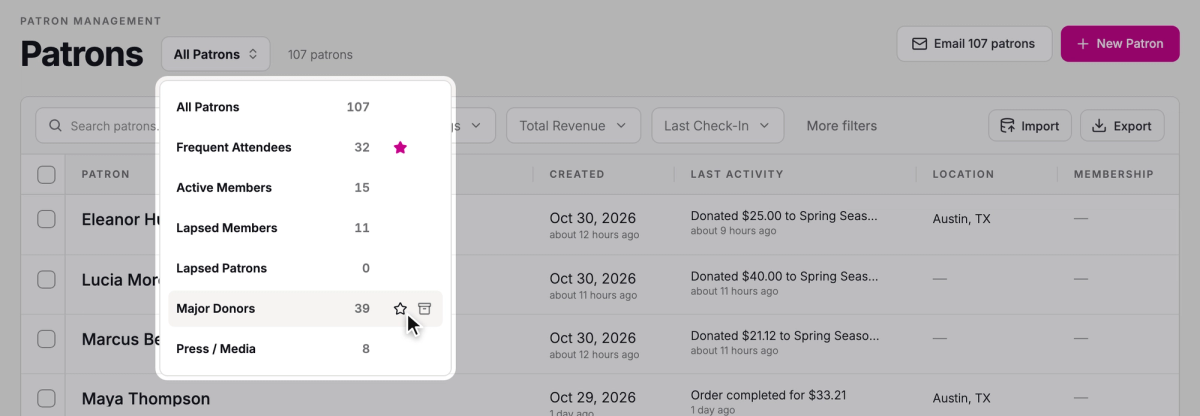
Pinned segments sit at the top of the segment menu and under Patrons in the sidebar, so the lists you use most are a click away.
- Step 1:
Open the segment menu.
- Step 2:
Point to the segment and click its star (Pin segment).
Archive a segment
When a segment has done its job, archive it to tidy up the menu.
- Step 1:
Open the segment menu.
- Step 2:
Point to the segment and click Archive segment.
- Step 3:
Click Archive.
The segment is removed from the segment menu.
Use a segment
- Step 1:
Pick the segment from the segment menu.
- Step 2:
Click the button above the list that reads Email followed by the number of patrons.
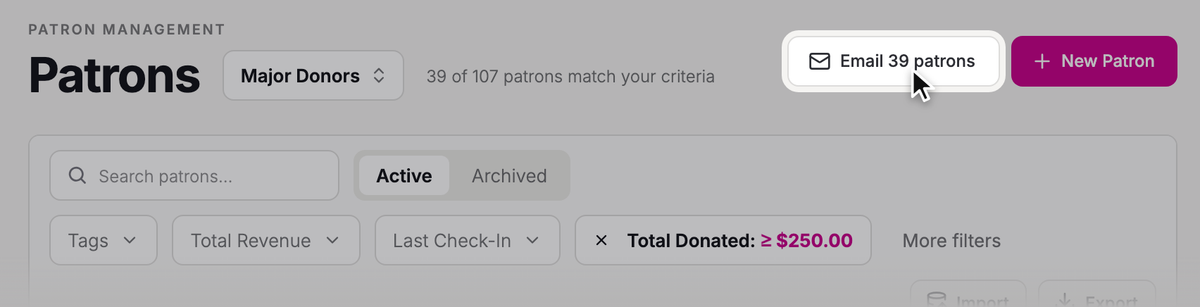
The New email page opens with your segment as its audience, ready for you to write your message.
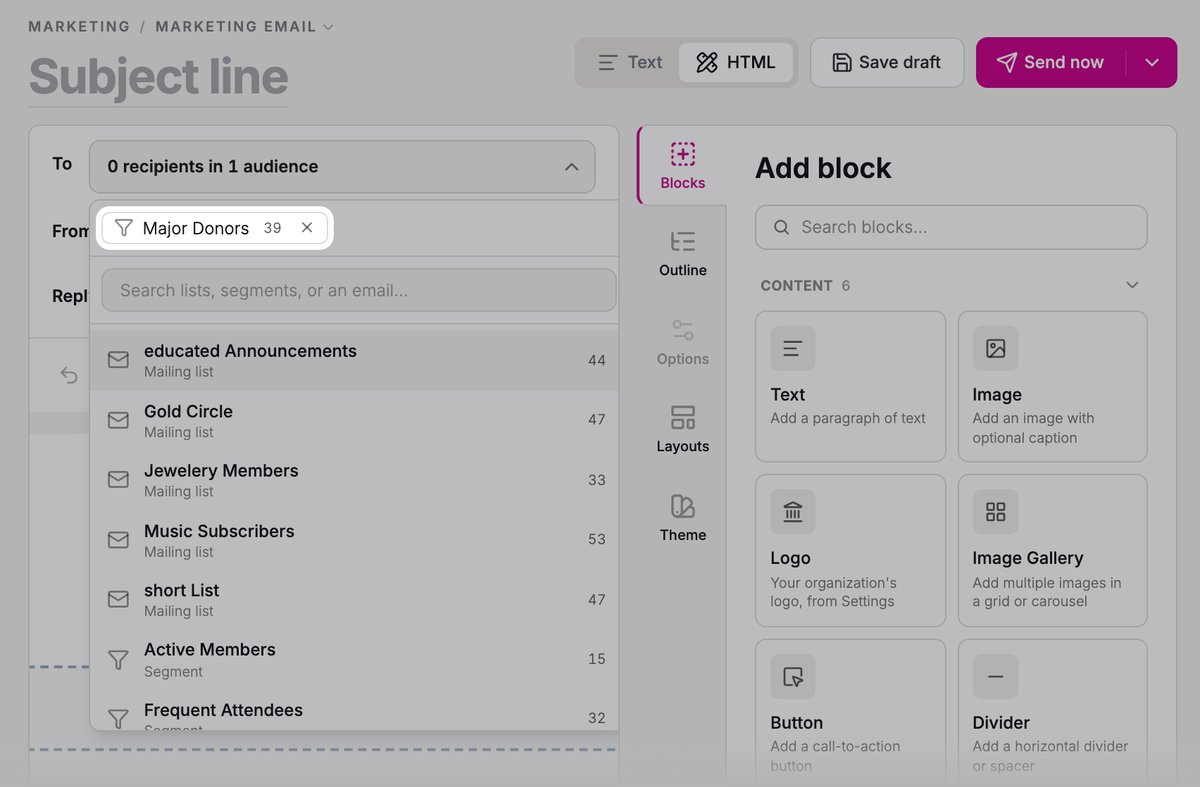
When you send it, the email goes to the segment's patrons who can receive marketing email. Patrons who've opted out of marketing email, or who have no email address, are left out.
SuggestedPatron communication preferencesWhy some patrons don't get marketing email, and how they choose what they receive.You can also invite a segment to a show. On the event's VIP Invitations tab, click Send invitations, choose Segment, and check one or more segments: everyone who matches when you send is invited.
 SuggestedSend VIP invitationsHow to send free-ticket invitations to a segment, and track who's coming.
Was this article helpful?