
Make your website look like your brand
Set your website's colors, fonts, corners, and spacing with a theme, check it's easy to read, and put it on your site.
Your theme decides the colors, fonts, and shapes your whole website uses, from the buttons to the footer. Here's how to start from a ready-made look, swap in your brand's colors and fonts, check that everything's easy to read, and put the theme on your site. Let's get started!
Before You Start
Have your brand colors handy as hex codes, like #1a2b3c. If your brand guide only gives RGB or CMYK values, ask your designer for the hex codes.
Know the names of your brand fonts too. You can choose any Google Font, so if your brand font isn't one, pick the closest match.
Open your theme
Your site starts with one theme, called Default, and every page uses it. Changes to a theme go live as soon as you save them: there's no publish step like there is for pages. So rather than changing your live site while you experiment, work on a copy and switch your site over once it's ready.
- Step 1:
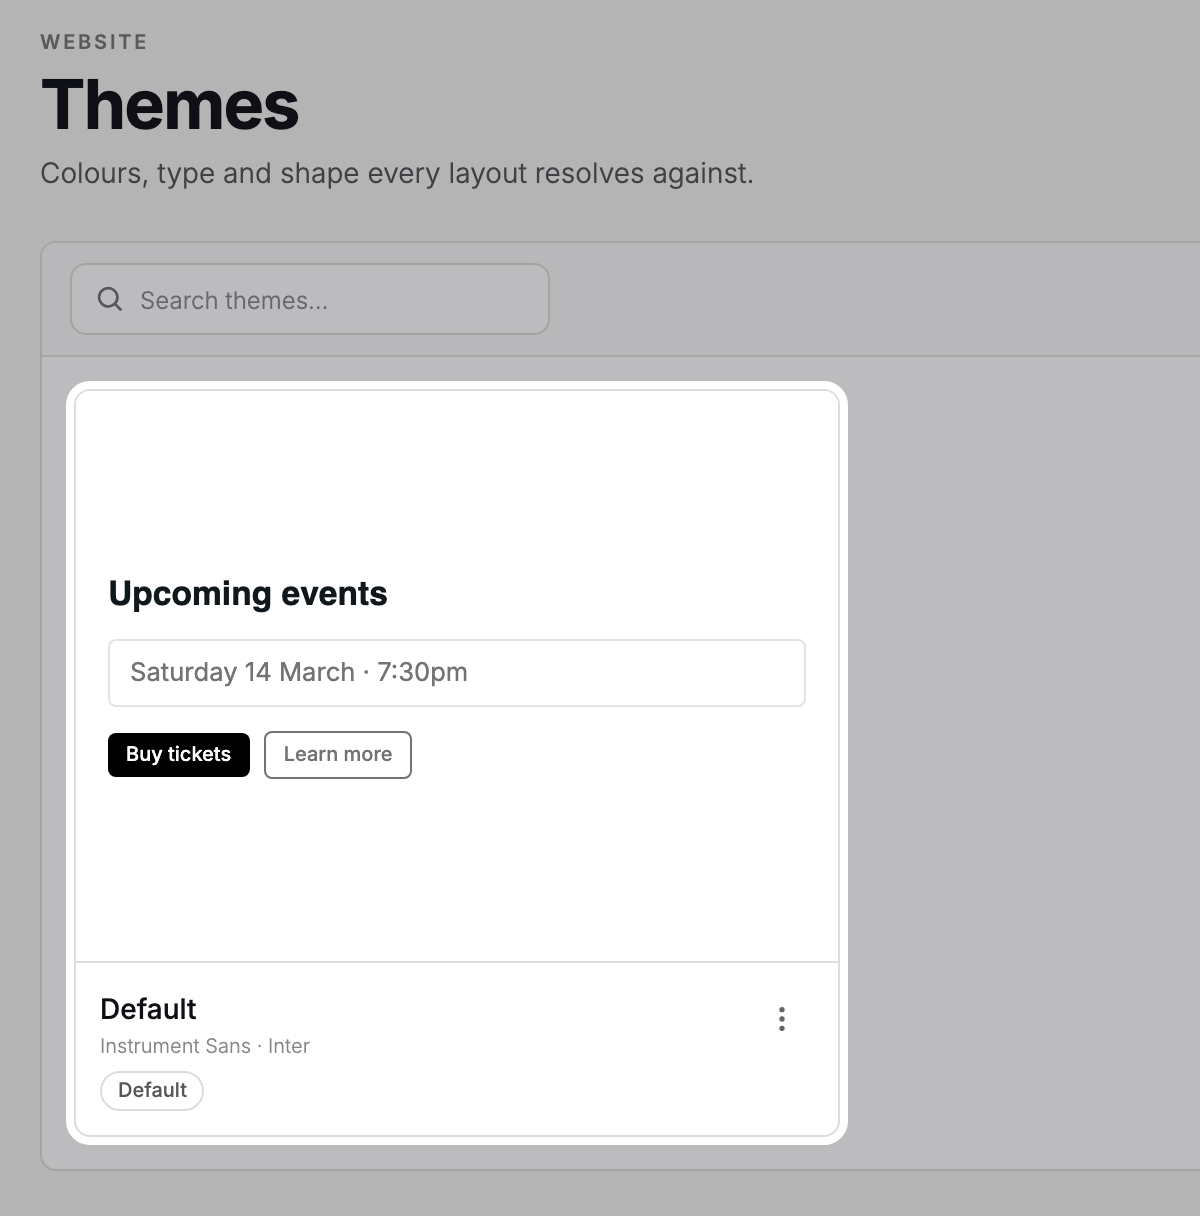
In the sidebar, click Website, then Themes.
- Step 2:
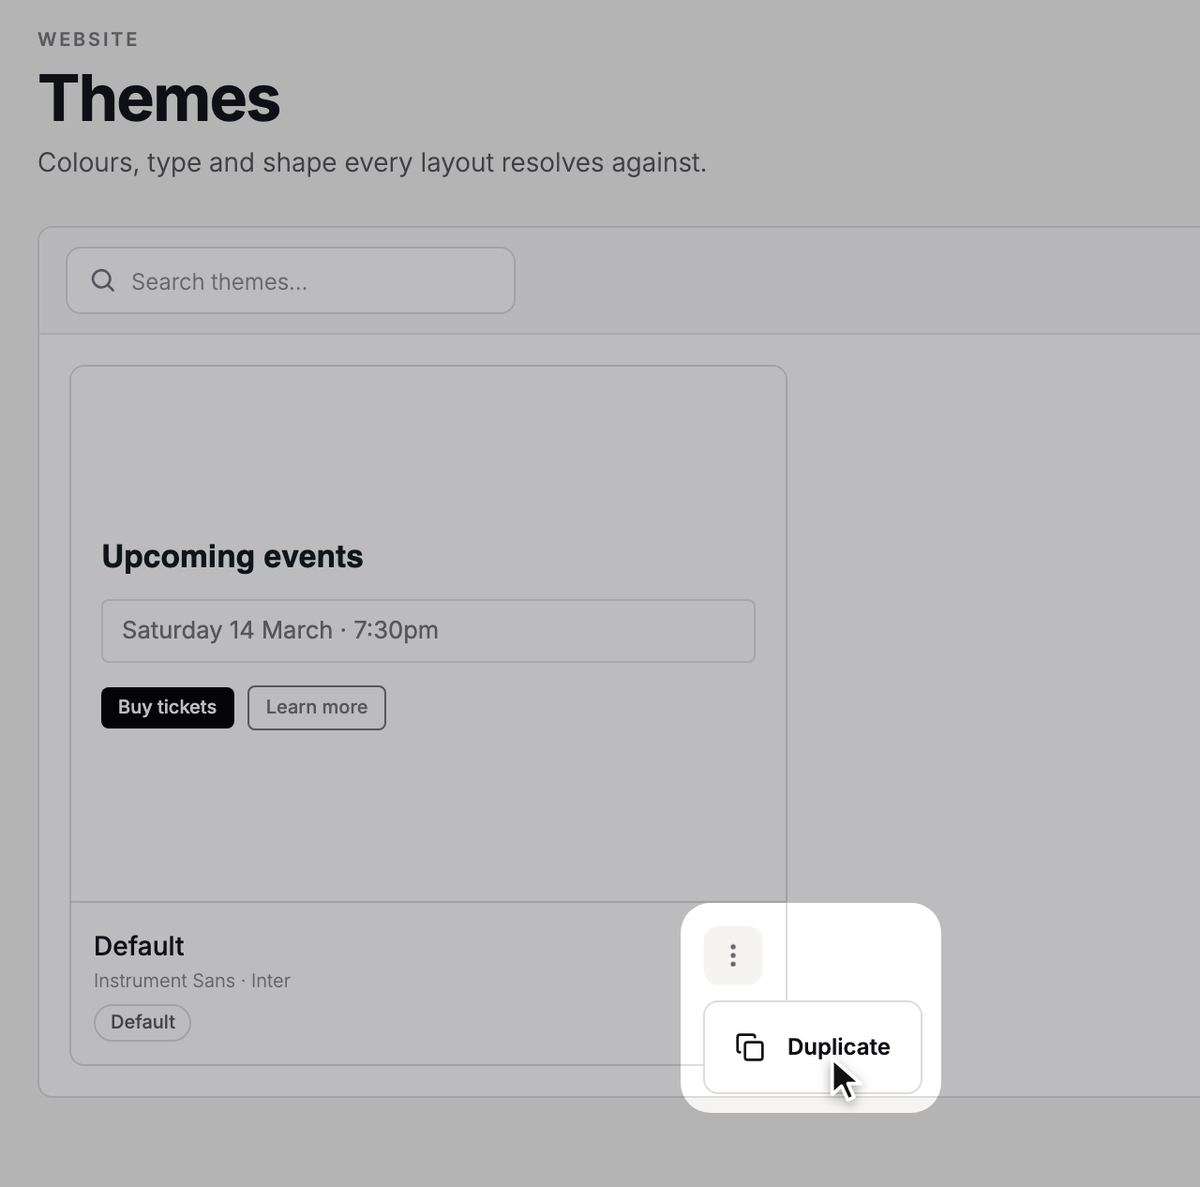
Click the ⋮ menu on the Default card and click Duplicate. A copy called "Default (copy)" appears.
- Step 3:
Click the picture at the top of the copy's card to open it in the theme editor.
- Step 4:
Click the name at the top and give your theme a name you'll recognize, like your organization's name.
The editor shows a live preview on the left and the settings on the right. Save as often as you like: your copy isn't on your site until you switch to it.
Start from a preset
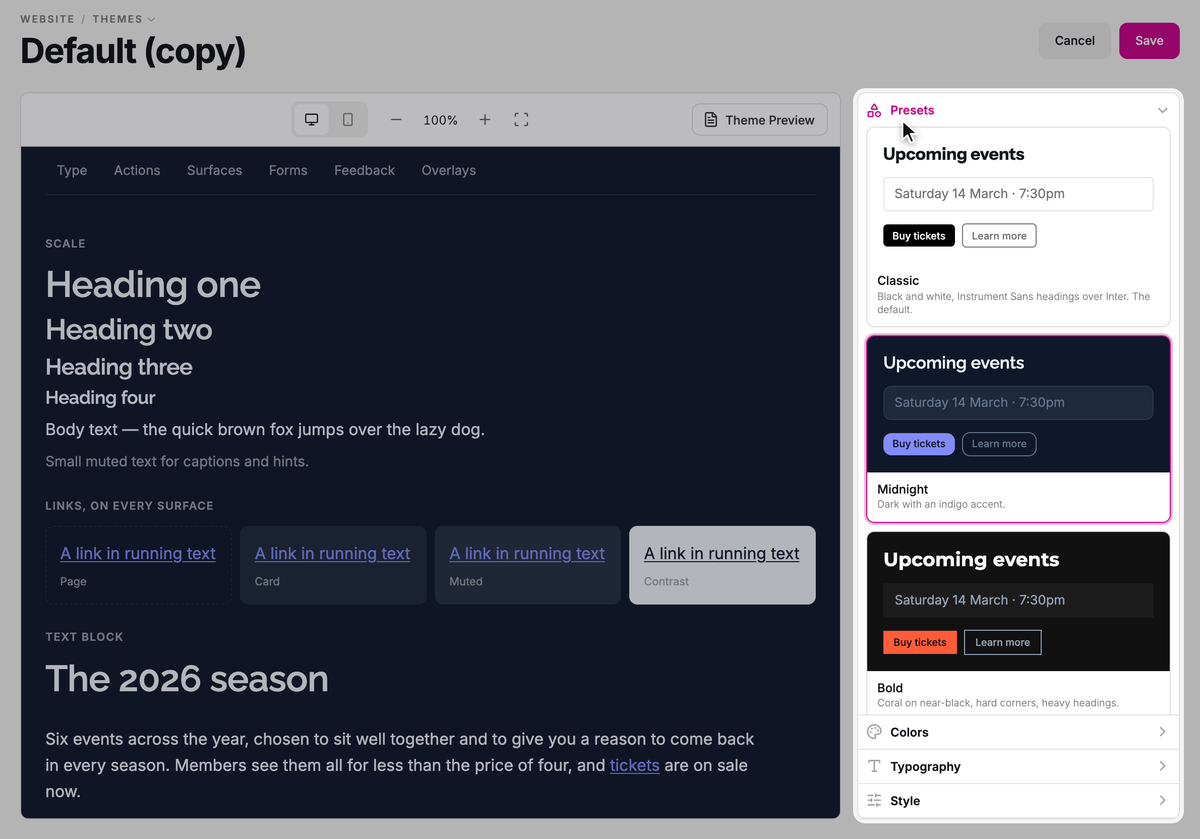
Presets are ready-made looks, like Classic (black and white), Midnight (dark with an indigo accent), and Bold. A preset replaces the theme's colors, fonts, corners, and spacing all at once, so pick one first and fine-tune it afterwards.
- Step 1:
Click Presets.
- Step 2:
Click a preset to apply it, and the preview shows the new look. Click a few to compare, and stop on the one you like best.
If none of them is close to your brand, skip this step: the colors and fonts are next.
Set your colors and fonts
Here's what each palette color is for:
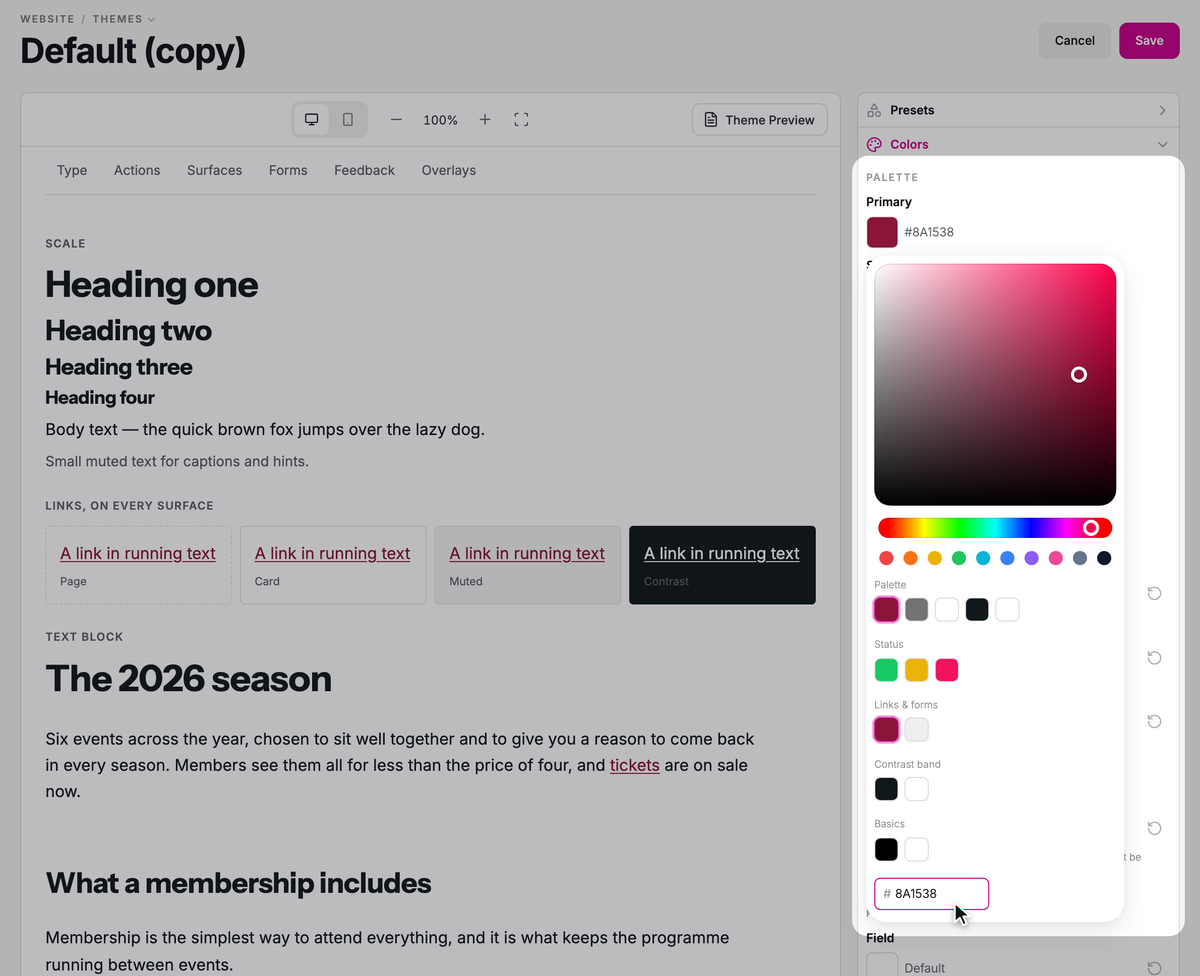
- Primary: your main brand color, used for primary buttons.
- Secondary: secondary buttons.
- Background: the page itself.
- Text: your body text.
- Surface: cards and panels.
- Step 1:
Open Colors.
- Step 2:
Under Palette, click a color, then type or paste its hex code. Repeat for each color.
- Step 3:
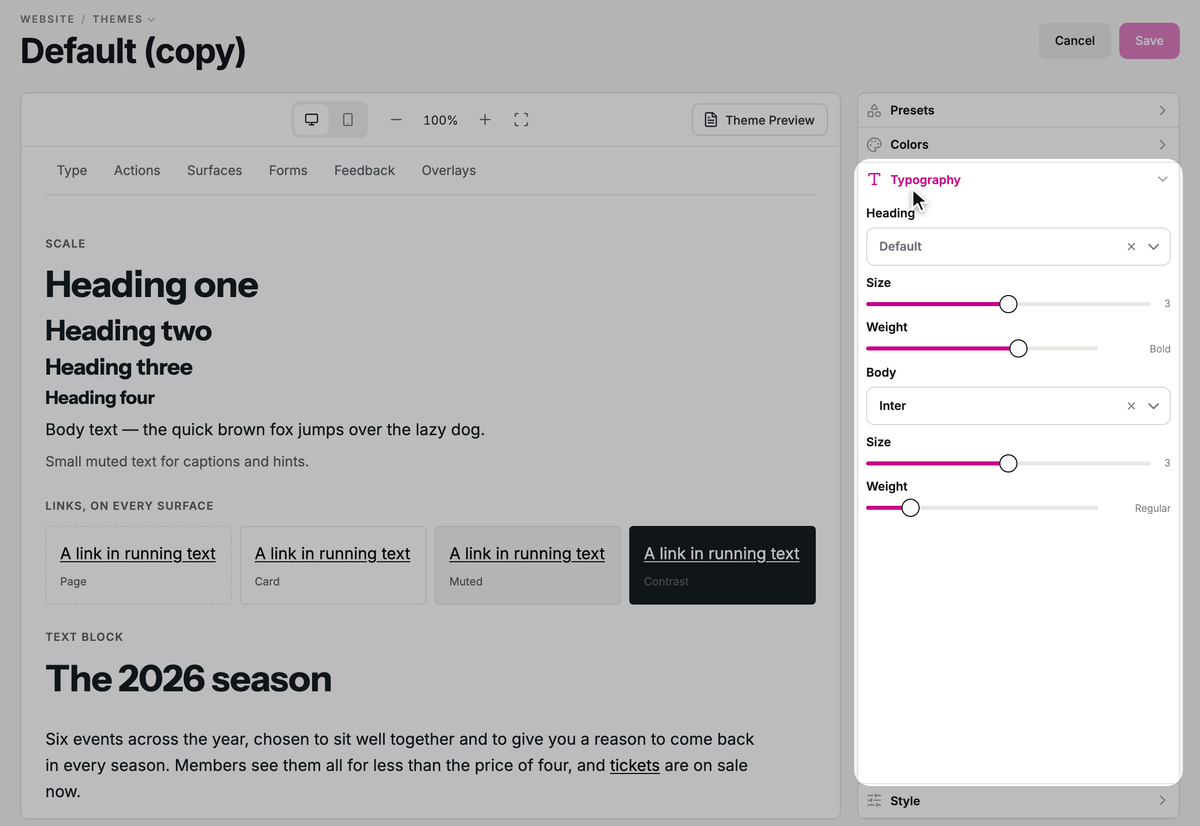
Click Typography.
- Step 4:
Under Heading, search for your heading font and choose it. Use Size and Weight to adjust it.
- Step 5:
Under Body, choose the font for everything else the same way.
Stageworks makes the text on your buttons black or white, depending on how light the button is.
Links are based on your Primary color unless you set a Link color of your own under Links.
Sections that need to stand out, like your site's footer, use the Contrast band colors. They start as your Text and Background swapped; set your own only if you want those sections in other colors.
Adjust corners and spacing
- Step 1:
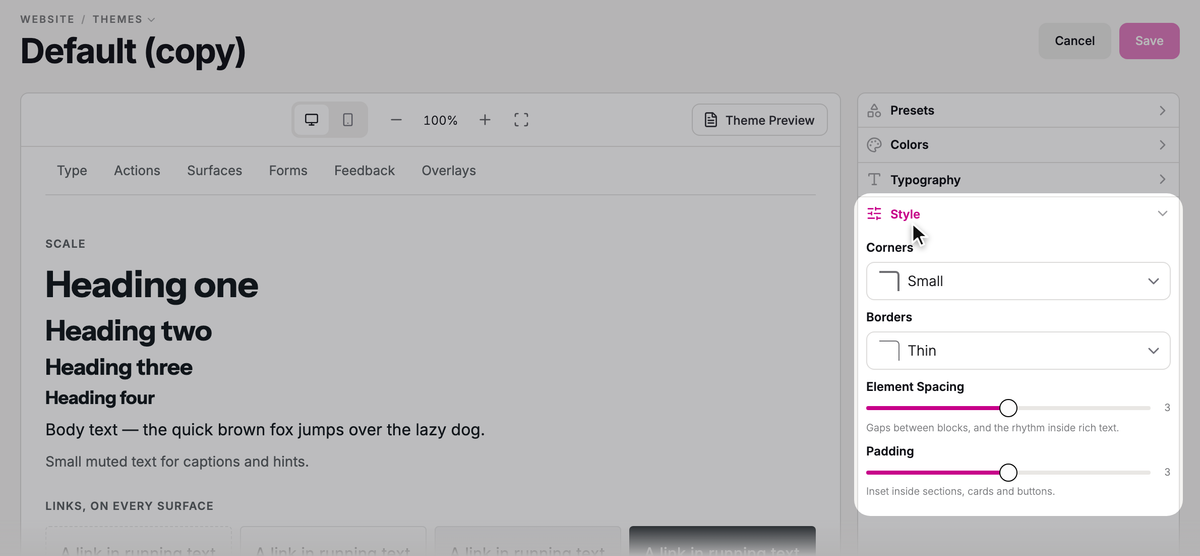
Click Style.
- Step 2:
Choose your Corners, from None for square corners to Full for fully rounded ones.
- Step 3:
Choose your Borders, from None to Thick.
- Step 4:
Drag Element Spacing to set the space between blocks, and between paragraphs in your text.
- Step 5:
Drag Padding to set the space inside sections, cards, and buttons.
Check readability
If any of your colors make text hard to read, you'll see Hard to read at the top of the Colors panel. Each line names a place on your site, like "Text on primary buttons" or "Body text on cards and panels".
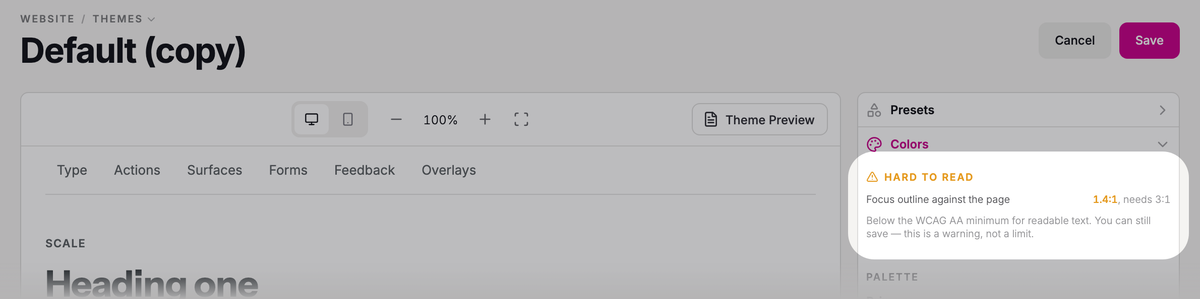
It's a warning, not a limit: you can still save. But some visitors will struggle with that text, so adjust the colors used in that place until the line disappears. For button text, make Primary or Secondary lighter or darker.
Then see how the theme looks on your own pages:
- Step 1:
Above the preview, click Theme Preview.
- Step 2:
In Preview a page, choose one of your pages. The preview shows it in your theme.

- Step 3:
Click Mobile to check it on a phone-sized screen, then Desktop to go back.
- Step 4:
When you're happy, click Save.
Saving updates every page that uses this theme right away. If you're working on a copy, your site won't change until you switch to it. Here's how.
Use a different theme on your site
Your pages share a layout: the header, footer, and page width around them, which you edit from the page editor's Layout tab. That's also where you pick the theme.
- Step 1:
In the sidebar, click Website, then Pages.
- Step 2:
Click any page's title to open it in the editor.
- Step 3:
Above the page, click Layout.
- Step 4:
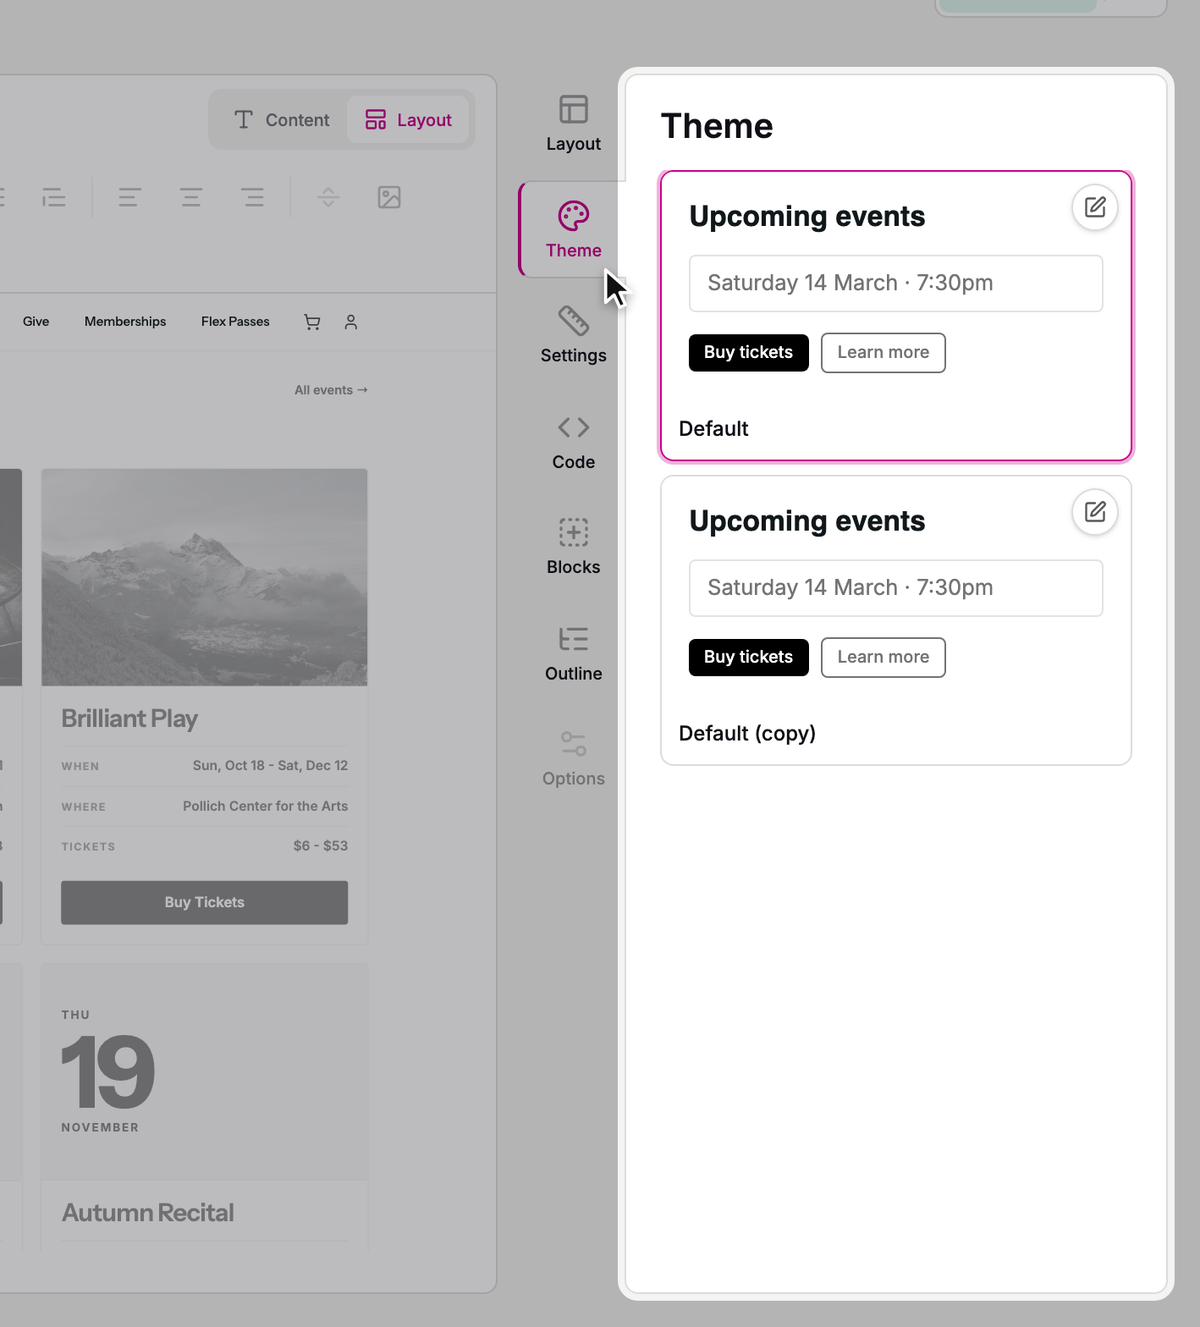
In the panel on the right, click the Theme tab.
- Step 5:
Click your theme.
- Step 6:
Click Change theme.
Your new theme is live straight away on every page that uses this layout, with no publish step. If some pages still show the old theme, they use a different layout: open one of them and change its theme the same way.
Set as default, in a theme card's menu on the Themes page, doesn't change your site. It only picks the theme that new layouts start with.
SuggestedEdit a page and publish your changesYour site looks the part. Now put your own words and pictures on its pages.Was this article helpful?
Your Stageworks website
What's on your Stageworks website from day one, how its pages, layout, and theme fit together, and where to go to change each one.
Edit a page and publish your changes
Change what's on a page of your website, check it on your site, and publish it when it's ready.
Edit your site's header, menu, and footer
Set up the logo, menu, and footer that appear on every page of your Stageworks website, then publish them in one go.
Add a page to your website
Create a new page on your Stageworks website, publish it, add it to your menu, and archive or delete it when it's no longer needed.
Show events, campaigns, and passes on a page
Add listing blocks to a page of your website to show your published events, campaigns, memberships, and passes, or to feature one show.