
Edit your site's header, menu, and footer
Set up the logo, menu, and footer that appear on every page of your Stageworks website, then publish them in one go.
Your header and footer appear on every page of your site, so they're how patrons find their way around: your logo, your menu, and how to reach you. Here's how to set up your logo and name, build your menu, fill in your footer, and publish it all at once. Let's get started!
Before You Start
Have your logo ready as an image file, and the web addresses of any social media profiles you'd like to link to.
Open your site's layout
Your header and footer belong to your site's layout: the header, footer, and page width that your pages share. You edit it in the page editor, under Layout above the page, and a change there reaches every page that uses it.
- Step 1:
Click Website in the sidebar, then Pages, and click any page's title, such as Home, to open it in the editor.
- Step 2:
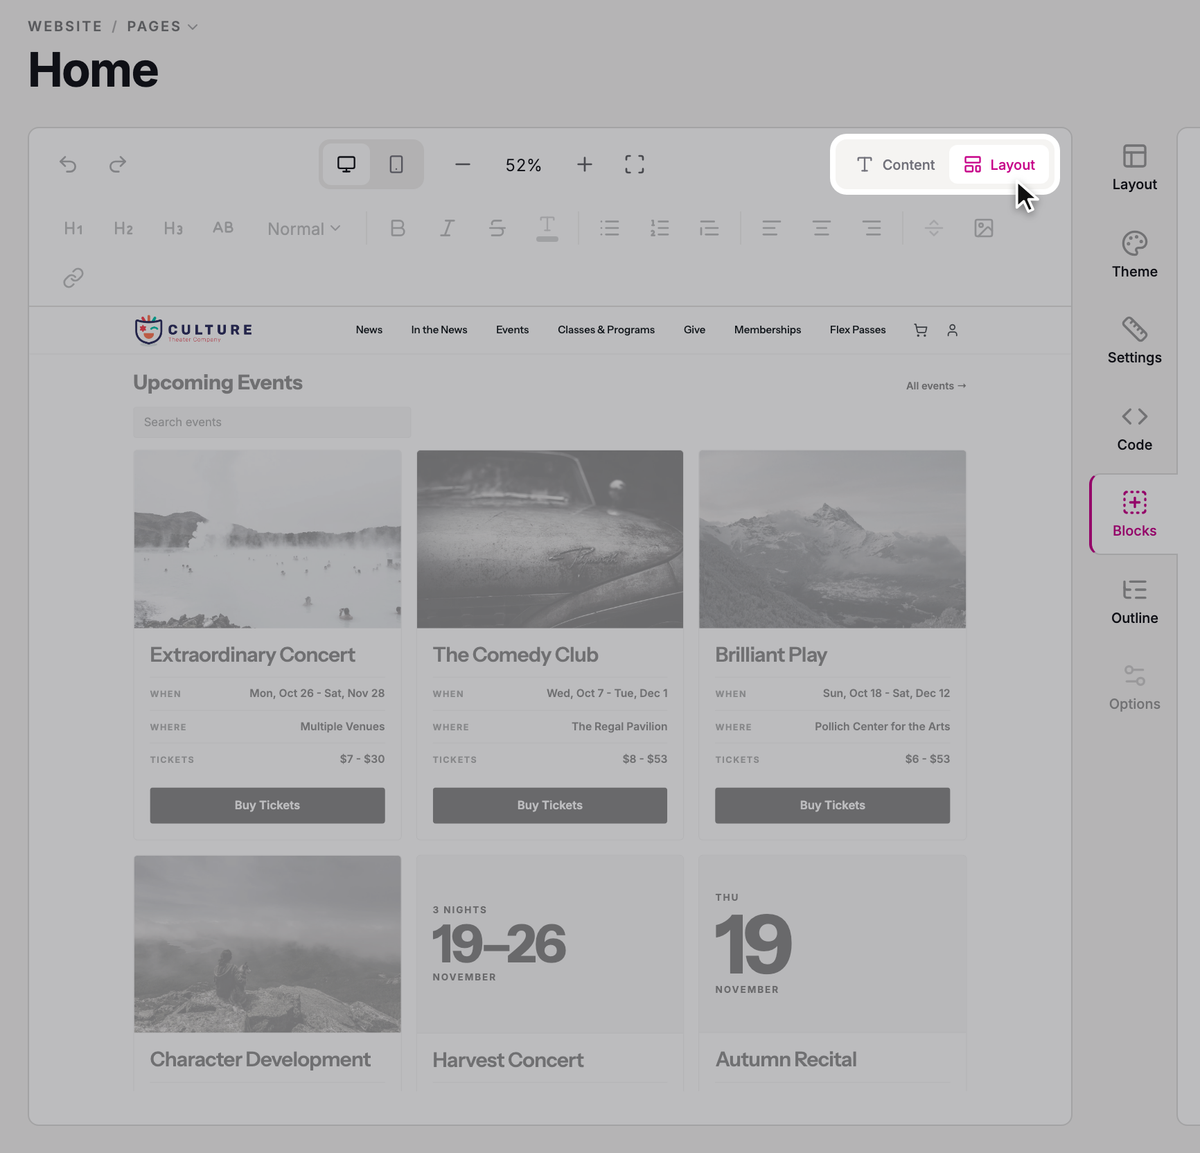
Above the page preview, click Layout. The page's own content dims, and the header and footer are ready to edit.
- Step 3:
In the panel beside the preview, click the Outline tab. Under Site Header you'll find Branding, Navigation, and Cart & Account, and under Site Footer, the parts of your footer.
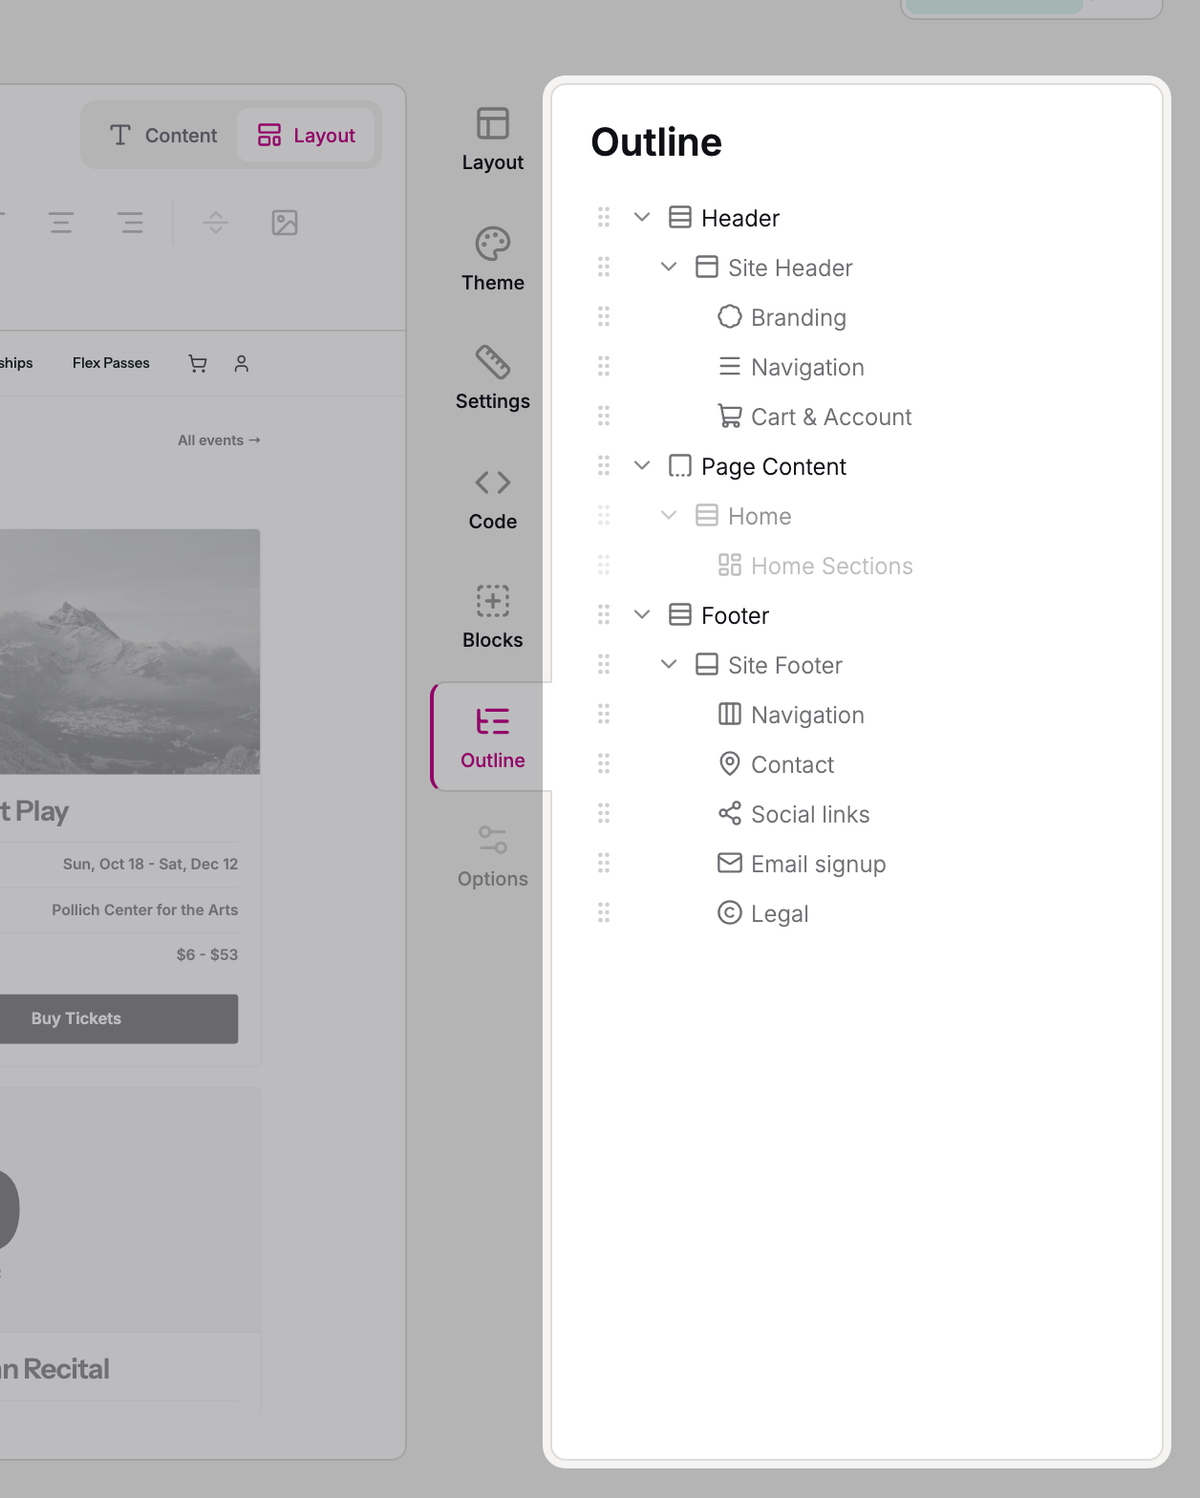
To edit a part, click it in the Outline, then open the Options tab. To leave a part off your site, like the footer's email signup, turn on Hidden at the top of its options.
Your logo and name
- Step 1:
In the Outline, click Branding, then open the Options tab.
- Step 2:
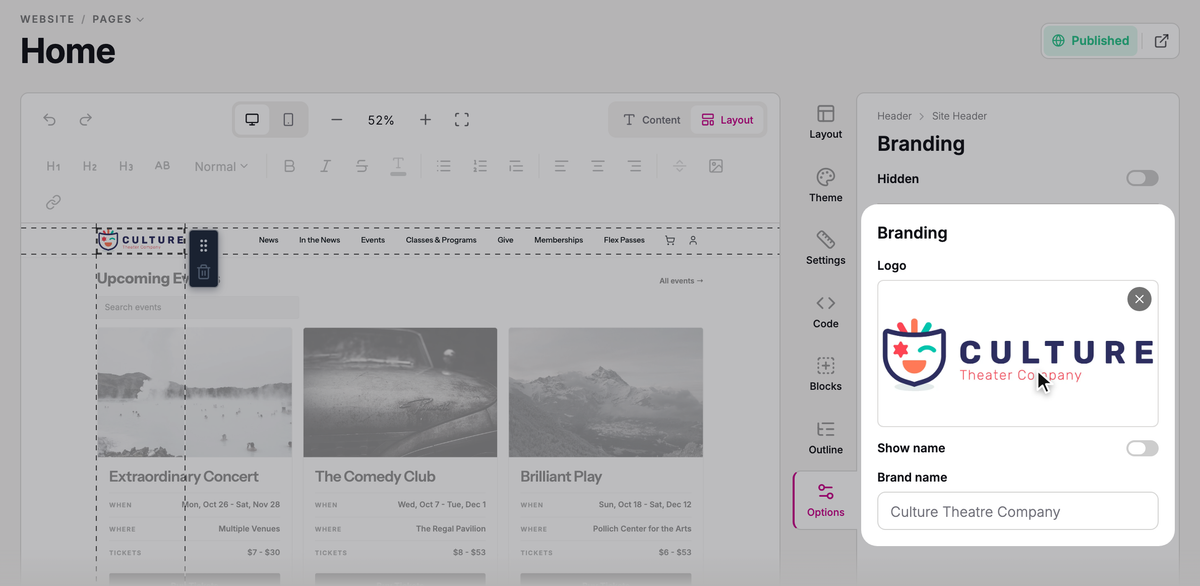
Under Logo, click the image box to open your image library, then upload your logo or pick it if it's already there.
- Step 3:
To show your name beside the logo, turn on Show name.
- Step 4:
Leave Brand name blank to use your organization's name, or type the name you'd like patrons to see.
- Step 5:
Pick a Font, Weight, Size, and Color for the name. It starts in your theme's heading font.
To change the colors and fonts across your whole site, see Make your website look like your brand.
Build your menu
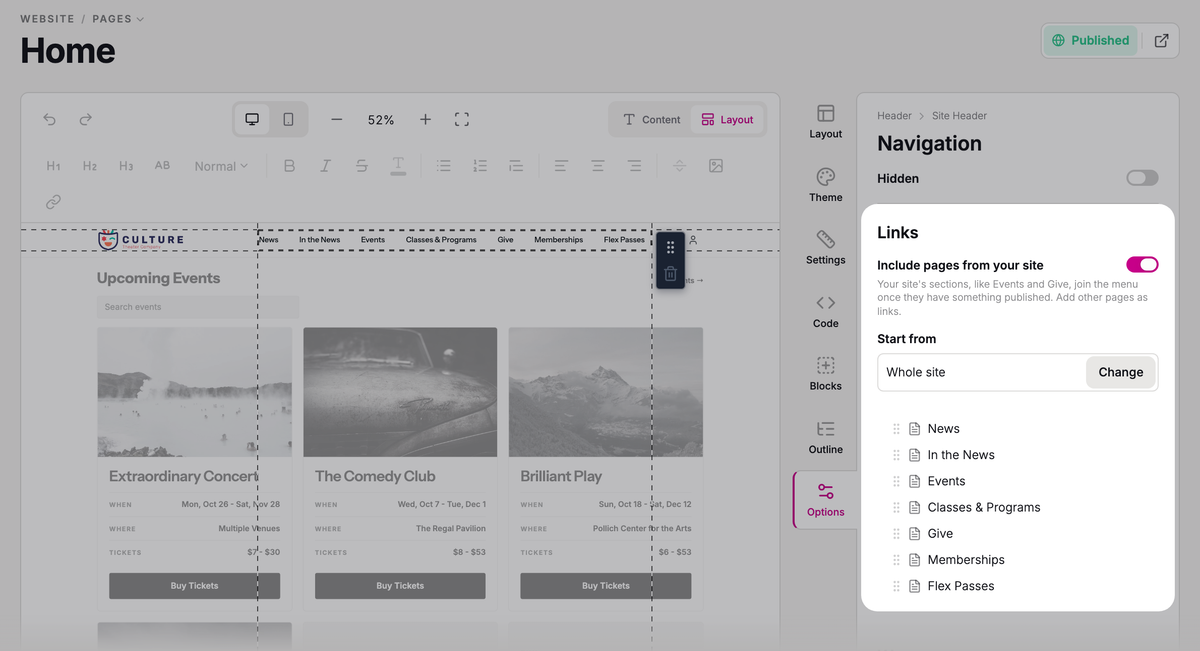
Your menu fills itself in: your site's sections, like Events and Give, join it once they have something published. A page you create yourself, like an About Us page, doesn't join the menu on its own: you add it as a link.
- Step 1:
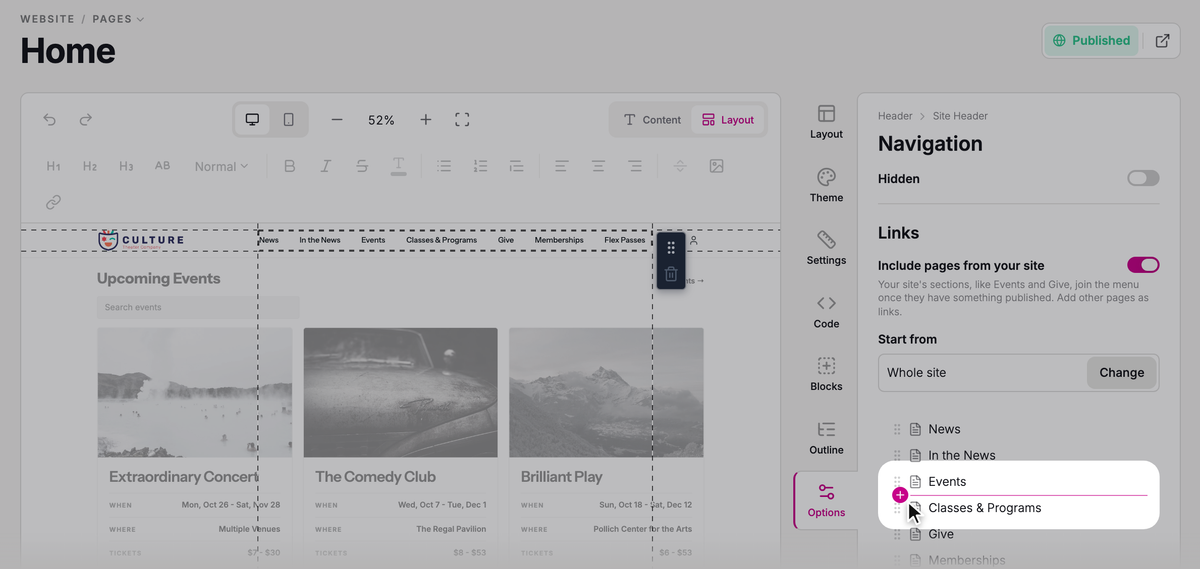
In the Outline, click Navigation under Site Header, then open the Options tab.
- Step 2:
Hover your mouse between two links in the list, where you want the new one, and click the plus sign that appears.
- Step 3:
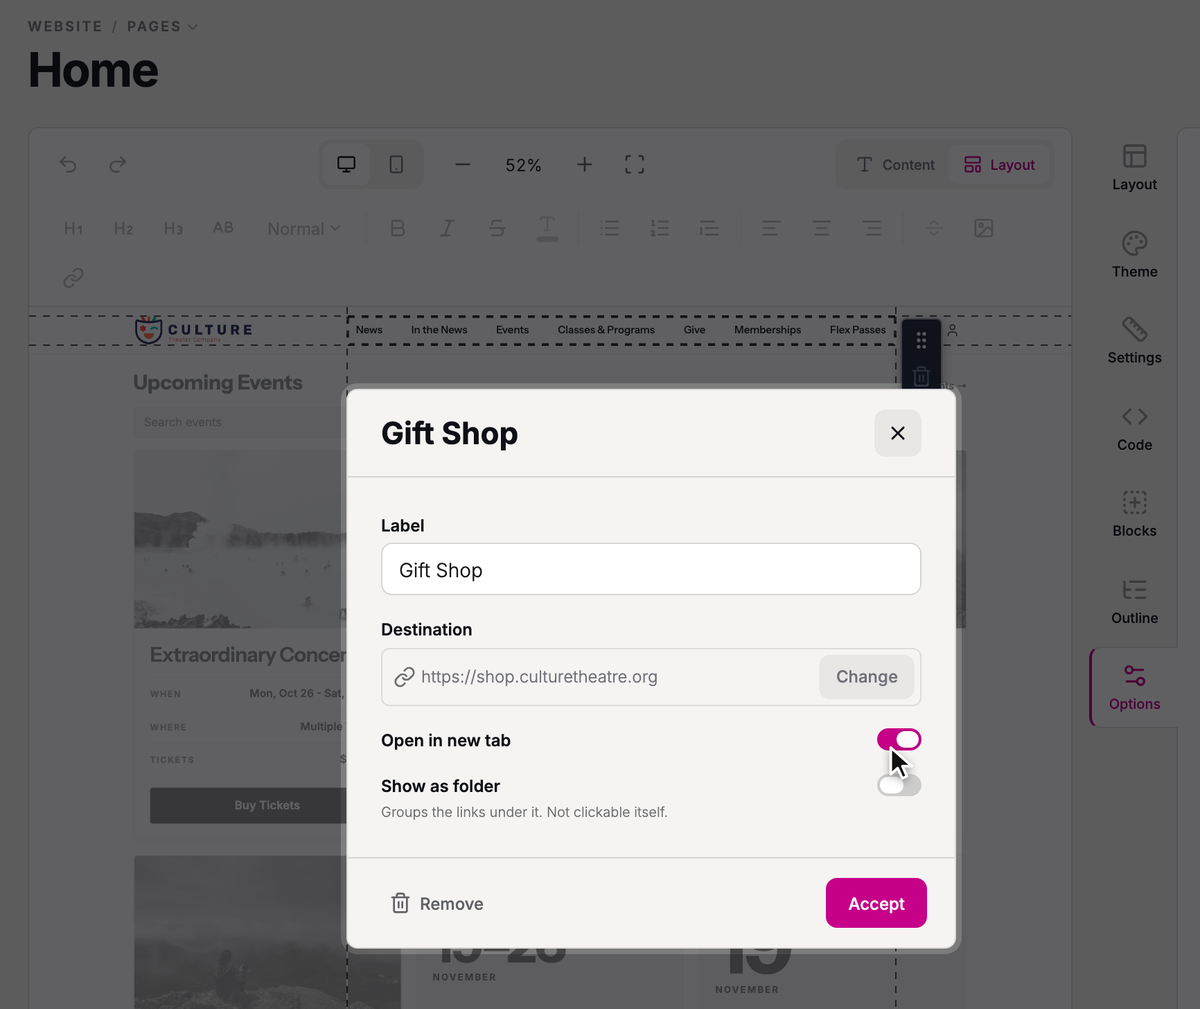
Type a Label: the words patrons see in the menu.
- Step 4:
Under Destination, click Choose destination, then pick one of your pages. For another website, click Custom URL instead, paste its address, and click Apply.
- Step 5:
For a link to another website, turn on Open in new tab so patrons keep your site open.
- Step 6:
Click Accept.
To tidy up the rest of the menu:
- To reorder, drag a link by the handle at its left. Drop it onto another link to tuck it underneath, as a dropdown.
- To rename a link, click its name and type.
- To hide a link, hover over it and click the eye icon. It stays in the list, dimmed, so you can bring it back.
- To group links under a heading that isn't a page, add a link with just a Label, turn on Show as folder, then drag links under it.
The header shows two levels: your top links, and a dropdown under each.
Cart & Account
Cart & Account adds a cart button and a sign-in button to your header, so patrons can check out and find their tickets and orders. You can change their Size and Color.
Your footer
The Site Footer has five parts, each edited the same way: click it in the Outline, then open Options.
Navigation
The footer's Navigation works just like your menu, with its own list of links. A top link with links tucked under it becomes a column heading, with those links listed below.
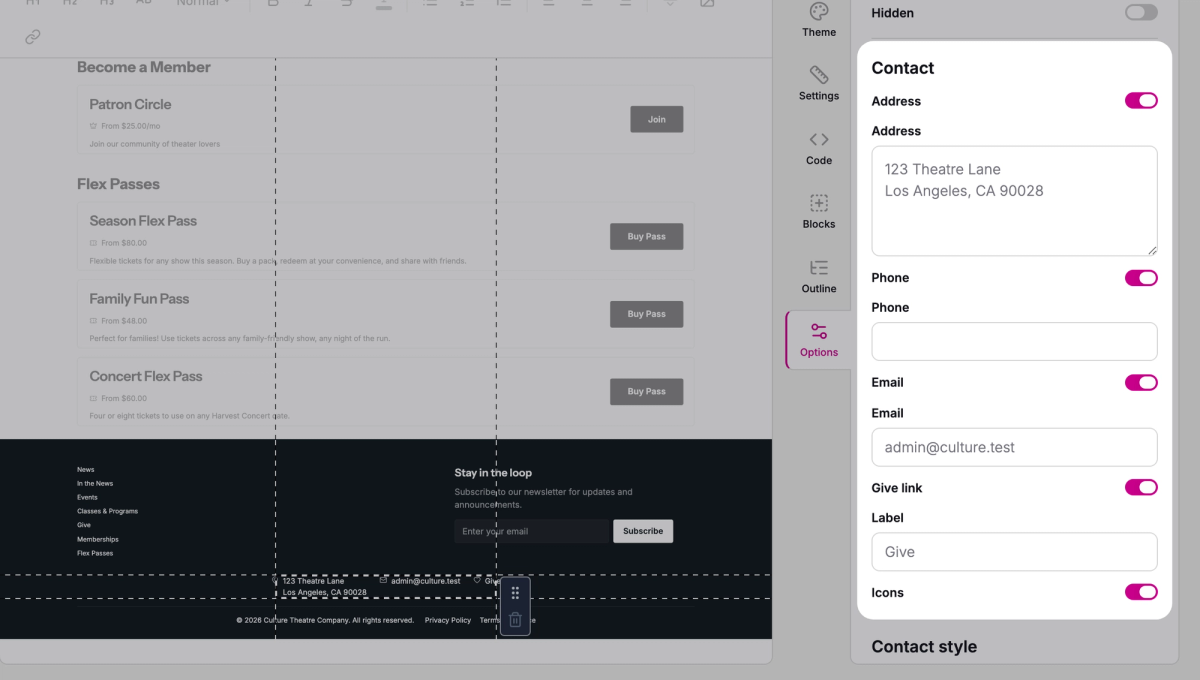
Contact
Address, Phone, and Email start with your organization's own details, shown in gray. Type over them only if your site should show something different, like your box office number, and turn off a line's switch to leave it out.
If you take donations, Give link adds a donate link to your footer while you have a fundraising campaign published, and Label sets its wording. See Run a fundraising campaign to set one up.
Social links
Click Add link, pick the Network, like Facebook or Instagram, and paste your profile's address in URL. Its icon appears in the footer once the address is in.

Email signup
The footer's Email signup lets patrons join your mailing list from any page. You can change its Heading, Description, Button text, and the Success message patrons see after signing up. Everyone who signs up here joins your default mailing list.
SuggestedLet patrons sign up for your emailsHow sign-ups reach your mailing list, and the welcome email they get.Legal
Copyright shows your copyright line. Leave it blank for a standard one with this year and your organization's name. The Privacy Policy link and Terms of Service link switches show links to the policy pages Stageworks provides for your site, with your organization's name filled in.
Save and publish your changes
- Step 1:
Click Save at the top of the editor.
- Step 2:
A dialog asks Save changes to the layout? (or Save the page and its layout? if you also changed the page), as a reminder that the layout is shared.

- Step 3:
Click Save & publish to put your changes live on every page that uses the layout. Or click Save only to save them without publishing, so visitors don't see them until you're ready.
Header and footer changes saved with Save only go live the next time you publish from the page editor, on any page that uses that layout. The editor warns you first.

For more on saving and publishing, see Edit a page and publish your changes.
Was this article helpful?
Your Stageworks website
What's on your Stageworks website from day one, how its pages, layout, and theme fit together, and where to go to change each one.
Edit a page and publish your changes
Change what's on a page of your website, check it on your site, and publish it when it's ready.
Make your website look like your brand
Set your website's colors, fonts, corners, and spacing with a theme, check it's easy to read, and put it on your site.
Add a page to your website
Create a new page on your Stageworks website, publish it, add it to your menu, and archive or delete it when it's no longer needed.
Show events, campaigns, and passes on a page
Add listing blocks to a page of your website to show your published events, campaigns, memberships, and passes, or to feature one show.