
Set up reserved seating for an event
Price your seating chart in tiers, then sell assigned seats for any date of your event.
Here's how to sell assigned seats for a date of your event. You'll split your seating chart into pricing tiers, choose reserved seating and your chart for the date, then give each ticket type a price in every tier. Let's get started!
Before You Start
You'll need an event and a seating chart for your venue. If you don't have them yet, start with Create your first event and Build a seating chart from an image.
The screenshots follow an example: a production of A Midsummer Night's Dream, sold on a 298-seat chart called Main Stage.
Add pricing tiers to your chart
A pricing tier is a group of seats that sell at the same prices, like Premium seats up front and Value seats at the back. You set up the tiers once on the chart, then price them on each date.
- Step 1:
Click Ticketing, then Seating Charts, and open your chart.
- Step 2:
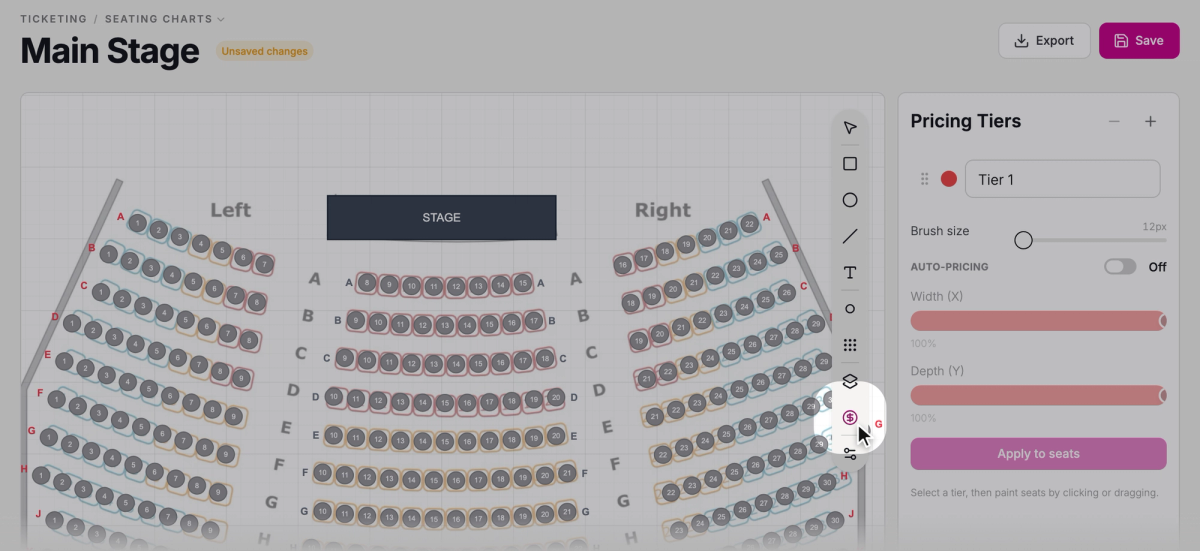
In the toolbar beside the chart, click the Pricing tiers tool (the dollar sign). The Pricing Tiers panel opens with Tier 1 to start.
- Step 3:
Click the + button (Add tier) once for each extra tier you need, up to 10 in all.
- Step 4:
Click each tier's name and type a new one. In the example, they're Premium, Standard, and Value.

List your tiers from your best seats to your cheapest. Auto-pricing, below, gives the first tier to the seats nearest the stage. To reorder tiers, drag them by the dots at the left of each row.
Each tier's color comes from its place in the list, so the colors shift when you add, remove or reorder tiers. You can't pick them.
Give every seat a tier
Make sure every seat has a tier. The quickest way is auto-pricing, which splits your house into zones around the stage, one for each tier.
- Step 1:
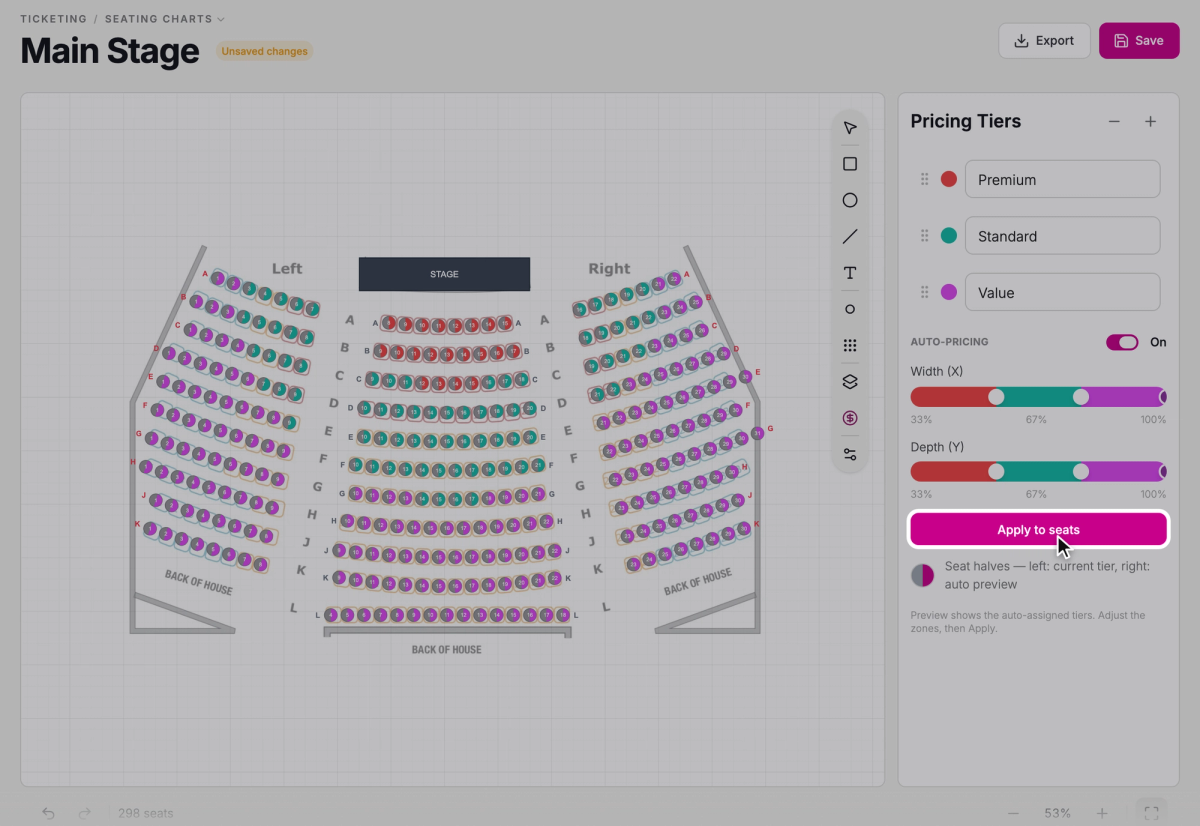
Turn on Auto-pricing. Each seat is split in two: the left half shows its tier now, and the right half shows the tier auto-pricing will give it.
- Step 2:
Drag the Width (X) sliders to move the zones' edges side to side, and the Depth (Y) sliders to move them toward or away from the stage, until each tier covers the seats you want.
- Step 3:
Click Apply to seats. Every seat now has a tier.
- Step 4:
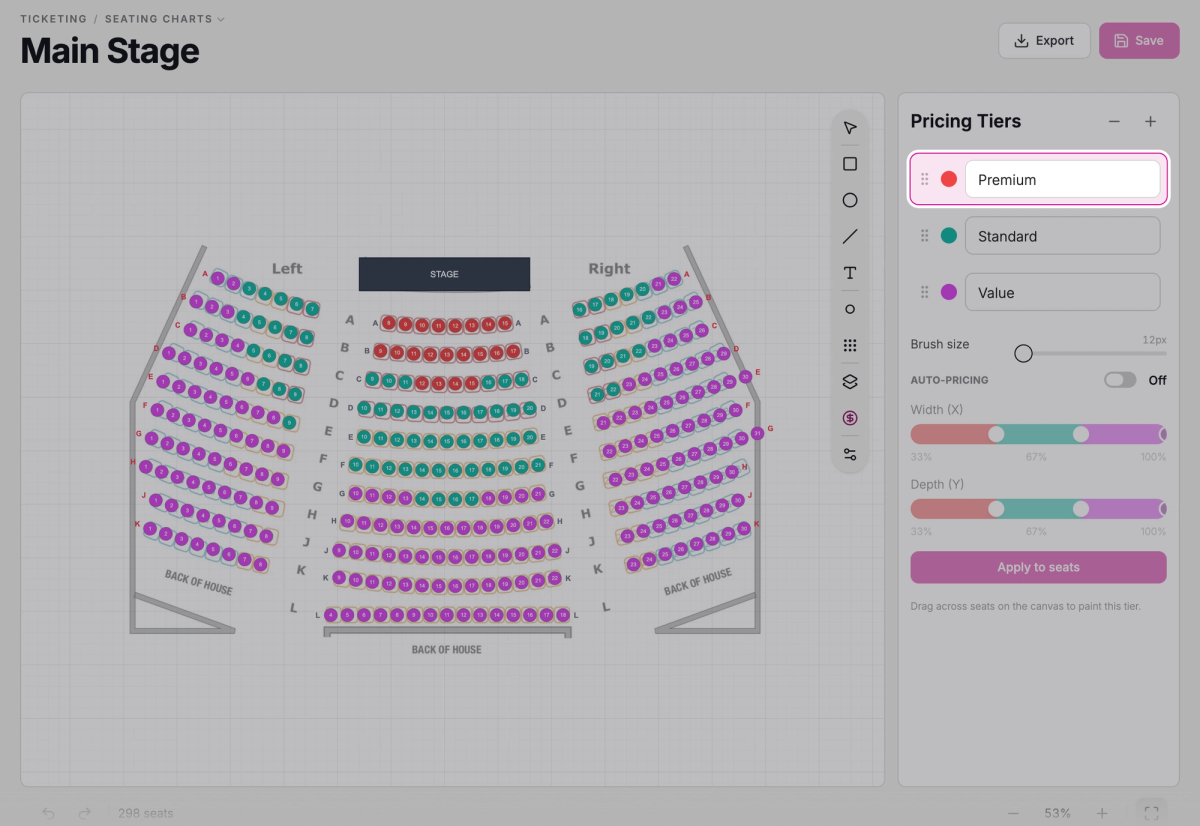
Turn Auto-pricing off. Your seats keep their tiers.
- Step 5:
To change seats by hand, click a tier, then drag across seats on the chart to give them that tier. Change Brush size to cover more or fewer seats at once.
- Step 6:
Click Save.
You'll see "Seating chart saved".
Choose Reserved and your chart for a date
- Step 1:
Click Ticketing, then Events, and open your event.
- Step 2:
Click the Dates tab, then Add Date. To set up a date you've already added, click it instead.
- Step 3:
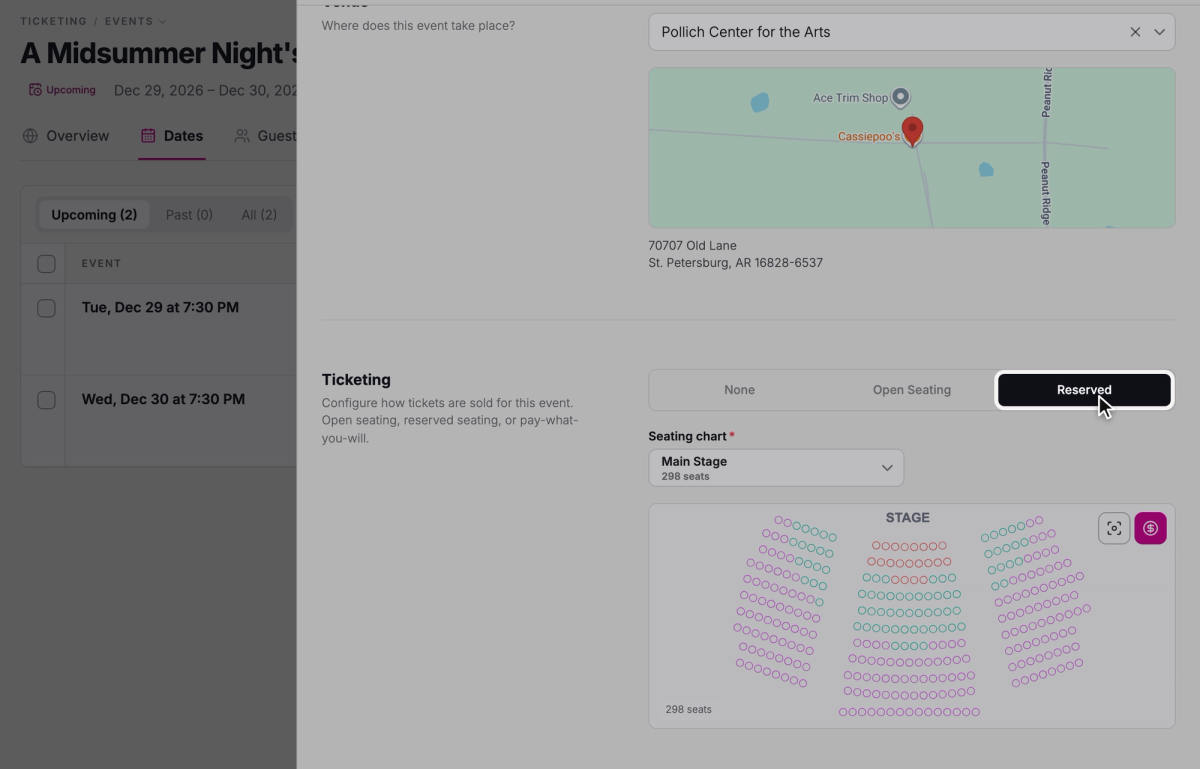
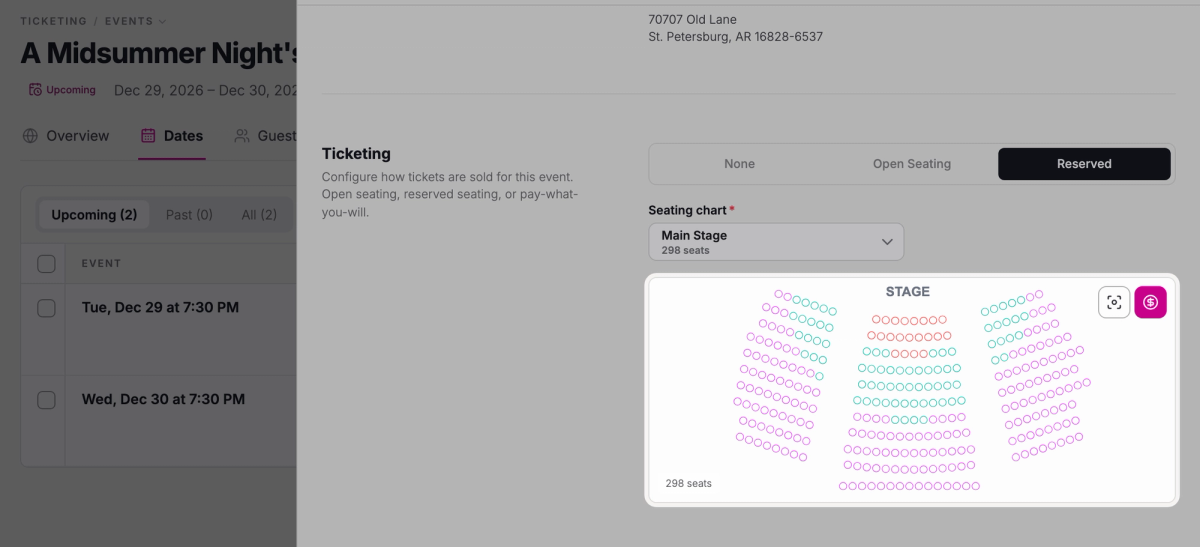
Under Ticketing, set Ticketing scheme to Reserved.
- Step 4:
Under Seating chart, choose your chart. Each one shows its number of seats.
A preview of the chart appears below, with each seat in its tier's color, so you can check you've picked the right one. There's no capacity to enter: the chart decides how many seats are for sale.
Price each ticket type per tier
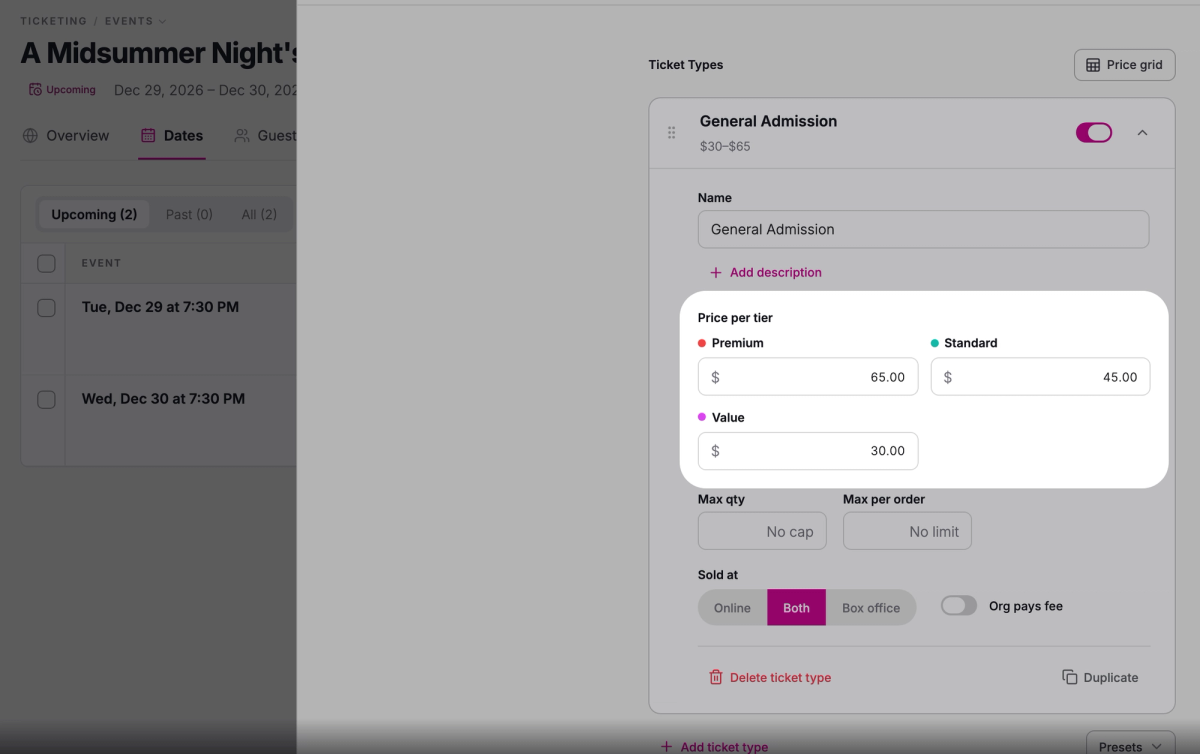
Every ticket type gets its own price in each tier. A new date starts with one ticket type, General Admission. That's just its name: every ticket on a Reserved date comes with an assigned seat.
- Step 1:
In the General Admission card, under Price per tier, enter a price for each tier. Each field shows its tier's color and name.
- Step 2:
To sell another kind of ticket, like Student, click Add ticket type and enter its Name.
- Step 3:
Or click Price grid to fill in every ticket type's prices in one table, then click Done.

- Step 4:
Click Create date, or Save changes if you're editing a date. On the New event page, click Create event.
You'll see "Date created". After you save, click a ticket type to see its prices again.
After tickets sell
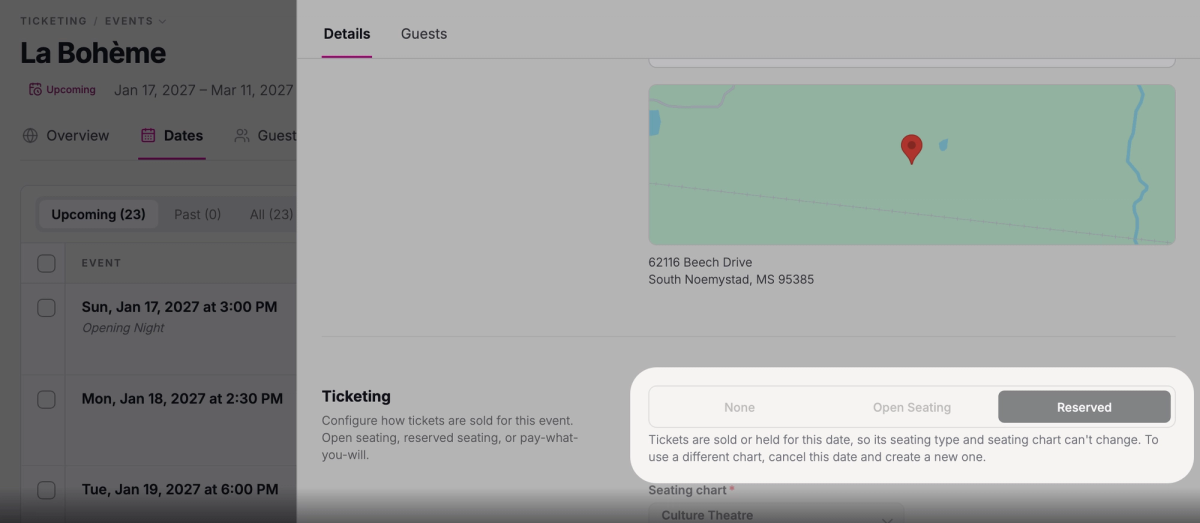
Once a date has tickets sold or held in a cart, you can't change its Ticketing scheme or Seating chart. To use a different chart, cancel the date and create a new one.
You can still change ticket types and prices. New prices apply to future sales, and tickets already sold keep the price they were sold at.
 SuggestedCancel an eventChoose refunds or credit for ticket holders when you cancel a date.
See who's sitting where
Once a date has sold tickets, you can see who's in each seat on its seating map. Open the date and click Seating map.
The map comes with a list of your seated guests and their seats. Hover over a seat to see who's in it, or click a guest to find their seats on the map.

What patrons see
When patrons buy tickets online, they can let Stageworks find the best available seats or pick their own on the seat map. Each seat costs their ticket type's price in that seat's tier. The tier colors are just for you: patrons don't see them.
Troubleshooting
"Seating chart is required for reserved seating"
The date is set to Reserved but has no chart. Choose one under Seating chart. If your chart isn't in the list, it may be archived: archived charts don't appear there. Look for it on the Archived tab in Ticketing → Seating Charts.
"Reserved seating requires a seating chart. Create one to enable this option."
Reserved seating needs a seating chart first, and your organization doesn't have one yet, or all its charts are archived. Build one in Ticketing → Seating Charts, then come back to the date.
"Price is required."
A ticket type is missing a price for one of its tiers. Fill in every tier on its card, or in the Price grid, then save.
"This change affects upcoming events"
You've added a tier to a chart that upcoming dates already use. On those dates, each new tier starts at the prices of a tier next to it, and the message lists them. Click Save anyway, then check those prices on each date's ticket types.
Was this article helpful?